*** Updated July 02, 2013 ***
- AdvancedSettings synced to XBMC XVBA thread
- Catalyst section update
- 03/05/2013: PPA sections (since Frodo is now the official realse), note about CPU load with advanced themes, Typo corrections
- 02/03/2013: Various updates
- 07/01/2013: Catalyst 12.10 included, Splashscreen correction, ACPI extinction addon
- 12/28/2012: grub fail boot timeout procedure
- 12/03/2012: Internal IR config correction
- 10/22/2012: Add Catalyst Legacy section for outdated Radeon HD graphics (previous to HD5000)
- 10/17/2012: Internal IR receiver for Zotac
- 10/13/2012: Catalyst 12.9 Quantal
- 24/09/12: Integration of Zotac NANO XS AD11
- 20/09/12: Catalyst 12.9 BETA update
- Link to share and sync Media Library using Mysql and Samba
- Catalyst 12.8 update
- Sound configuration in Eden
- ASIC bug hand fixed in all branches
- System tuning to improve performances
- XBMC integrated to your Web Browser
- XBMC integrated access to amdcccle
- XBMC integrated access to a File Manager
- Correcting troubles with shipped Zotac MCE remote control
************************
Edit April 04, 2013: Ubuntu 13.04 is out, don't use it as for now, there is no ATI Catalyst driver suitable for it, all recent versions are bugged and will result in CPU Overload.
Don't use 13.03, Keep 12.10. (or 12.04)
Edit 10/23/2012: Ubuntu 12.10 TLS is now out, i am currently checking all steps but this guide should still be applicable without major correction required
Major source:
http://forum.xbmc.org/showthread.php?tid=116996
Thanks to people working on XBMC for fusion systems!
For any issue with XBMC XVBA, this is the place to go ^^
You will also find my Howto in official Xbmc Wiki :
http://wiki.xbmc.org/index.php?title=Category:Installation
Please comment if you like, comment if you find any error or correction required :-)
Summary of steps:
Step 1: Install, optimize and tune your base Linux system
Step 2: Install some requirements
Step 3: Install ATI proprietary driver
Step 4: Install XBMC
Step 5: First XBMC start and base configuration
Step 5.a: Proceed to base settings
Step 5.b: Install Network Manager Addon (Optional)
Step 6: Optimize XBMC CPU usage and configure GPU sensor
Step 7: Configure Audio
Step 8: Configure Power Management
Step 9: Configure your Video Media Library and Home access screens using Smart Playlist
Step 10: Optional - Integrate a Web browser inside XBMC
Step 11: Optional - Integrate a file manager inside XBMC
Step 12: Configure Network services: UPnP, Airplay, XBMC web control interface
Step 13: Configure Remote Control
Step 14: Optional - Use Live TV
Memorandum
Installation and configuration of XBMC on Ubuntu based OS with AMD HD Graphics (tested with Zotac AD02, AD10, AD11 - Should work with any AMD based hardware)
The Goal:
Installing and configuring all the necessary to get a fully functional, stable and great XBMC media center on AMD Plateform using proprietary ATI driver and Hardware acceleration.
Software:
This configuration guide has been tested under Ubuntu based OS running 11.10 TLS and 12.04 TLS (desktop versions of Xubuntu and Lubuntu, Ubuntu Minimal)
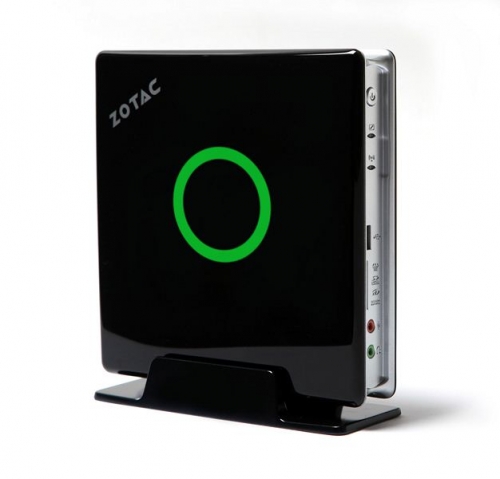
Hardware:
This configuration guide has been tested on Zotac AMD Based HTPC: ZOTAC AD02, ZOTAC NANO AD10 and ZOTAC NANO XS AD11.This is expected to work on any recent enough fusion system.
These HTPCs have quite the same hardware capacity; One major difference is the included and optional USB IR receiver for Zotac AD10/AD11, associated with its nice MCE remote control.
Also, only Zotac AD02/AD10 have an SPDIF output to serve Digital sound, digital sound for Zotac AD10 has to be achieved using HDMI output. (still you can buy an external USB sound card if you want SPDIF)
Both of them are embedded with an AMD E350 CPU with ATI Radeon HD able to deal with 1080p video and 5.1 Digital audio :-)
Zotac AD02 Model : AMD E-350 APU Platform (dual-core) (1.6 GHz) AMD Radeon™ HD 6310
Zotac NANO AD10 Model : AMD E-350 APU Platform (dual-core) (1.6 GHz) AMD Radeon™ HD 6310

Zotac NANO XS AD11 Model : AMD E-450 APU Platform (dual-core) (1.6 GHz) AMD Radeon™ HD 6320

Step 1: Install, optimize and tune your based Linux system
Important Note for Zotac Devices:
Last Zotac UEFI have introduced an option to set the UMA frame buffer size.
This setting will be used to set allocable Physical Memory for the graphic component.
By default, the size set may be to small and prevent you from being able to correctly playback HD files.
For other devices:
you still may have to check or set your UMA Frame Buffer Size, set to the higher value available on your hardware.
Choose and install your system:
First choose your Ubuntu version to install. This guide will only be fully applicable with an Ubuntu based version.
I will not cover the OS installation itself as there is a lot of tutorials on this subject and installation is enough easy right now.
I do not recommend using Ubuntu classic version as it provides by default a very resource consuming interface (Unity) and has a lot of problems and bugs running ATI proprietary driver!
As far as I know and as far as I have tested, the only Ubuntu bases distributions with absolutely no issue with the ATI proprietary driver are:
- Xubuntu : Ubuntu based version with XFCE desktop
- Lubuntu : Ubuntu based version with LFCE desktop
- Ubuntu Minimal: Ubuntu minimal installation, you will NOT have a desktop with it (by default)
Installation advises:
3 partitions :
- A first partition for the root system ( / )
- A second partition for home (/home)
- A small Swap partition (1 or 2 GB will largely be enough, a such system is not expected to really swap in normal conditions)
Other:
- Install Third party software (mp3 and so on)
- In the installation Software, use “xbmc” as a the login
- Activate auto login for the user "xbmc"
After your based installation has achieved, ensure you are fully up to date:
Update your system:
sudo apt-get update
sudo apt-get dist-upgrade –y
sudo reboot
If you installed Ubuntu Minimal:
sudo apt-get install ssh python-software-properties udisks upower xorg alsa-utils mesa-utils git-core librtmp0 lirc libmad0 lightdm lightdm-gtk-greeter lm-sensors
sudo adduser xbmc video
sudo adduser xbmc audio
Install SSH and set your Network configuration (optional set a static IP if you prefer):
sudo apt-get install ssh
Edit the /etc/config/interfaces file Comment out the line iface eth0 inet dhcp (or whatever your network adapter hardware device is)
Configuration example:
iface eth0 inet
static address 192.168.1.52
netmask 255.255.255.0
network 192.168.1.0
broadcast 192.168.1.255
gateway 192.168.1.1
dns-search YOURDOMAINNAME.COM
dns-nameservers 192.168.1.2 192.168.1.3
If you use Ubuntu Minimal and want to be able to set your Wifi connection from XBMC, you can use an XBMC addon called "Network Manager", it requires package from the same name:
sudo apt-get install network-manager
Note for Wireless Interface on Zotac AD10:
To manually install the driver, do as follows (thanks for people how commented it out)
The Zotac AD10 comes with different Wireless interfaces, depending on the model you shipped:
- Atheros chipset: Working out of the box in Ubuntu 12.04
- RT2860: Manual installation required
wget http://downloads.zotac.com/mediadrivers/mb/download/NB087_WiFi_V2600_20120508.tar.gz
tar -zxvf NB*.tar.gz
sudo make
sudo make install
cd os/linux
insmod rt3290sta.ko
sudo reboot
For each ext4 filesystem, edit your /etc/fstab and add "noatime" in mount options, example:
# / was on /dev/sda1 during installation UUID=affe0f48-6b88-43a5-b131-20a58cd776b8 / ext4 errors=remount-ro,noatime 0 1
- Go in UEFI (new BIOS) and ensure to set your Sata mode to "AHCI"
- Edit your fstab to add "discard" in mount options for each partition on your SSD, this will enable TRIM, example:
# / was on /dev/sda1 during installation
UUID=affe0f48-6b88-43a5-b131-20a58cd776b8 /   ext4    errors=remount-ro,noatime,discard  0       1
For more information, see:
https://sites.google.com/site/lightrush/random-1/howtoconfigureext4toenabletrimforssdsonubuntu
3. If you have a large amount of RAM (beginning on 2GB), tune swapiness
For more information, see:
Add theses values to /etc/sysctl.conf:
vm.swappiness=10
vm.vfs_cache_pressure=50
4. Turn /tmp into tmpfs to use RAM instead of HDD or SSD
Using this you will turn your "/tmp" directory (used by many programs as their temp directory) into a tmpfs, which means this will reside into you virtual memory instead of the HDD or SSD partition
# tmpfs
tmpfs   /tmp    tmpfs   defaults,noatime,mode=1777      0       0
You may see on different posts people also turning /var/tmp, /var/run and others into a tmpfs.
This not useful anymore as it has been turned aleready into a tmpfs in recent distributions. (they are all linked into /run which is into a tmpfs)
Use "mount" to see all mounted tmpfs, you should now see /tmp and /run mounted that way.
If you are using XFCE as the Window Manager (eg. Xubuntu or XCFE manually installed), you should deactivate "compositing":


Reboot- Under your Session, go to parameters > Window Manager Tweaks and disable compositing


Tune your system:
This can be easily corrected with the good option in grub default file (thanks to the anonymous comment).
Edit "/etc/default/grub" and add: (change the timeout value to the value of your choice)
GRUB_RECORDFAIL_TIMEOUT="10"
Update grub:
sudo update-grub
Replace the system splash screen with an XBMC related:
Edit 01/07/2012: Thanks to Nick, Splash screen may be broken after Grub install / updates, please follow the instruction in case you have an issue
Edit 10/24/2012: If this does not work for you (you get some strange screen or nothing moving) please try a lower resolution.
You may prefer to replace your OS default splash screen by the XBMC splash screen:
Do:
sudo apt-get update
sudo apt-get install plymouth-label v86d
wget http://excyle.nl/plymouth-theme-xbmc-logo.deb
sudo dpkg -i plymouth-theme-xbmc-logo.deb
FRAMEBUFFER=y
Choose you Resolution mode:
- "720x480"
- "720x576"
- "1280×720"
- "1366x768"
- "1920x1080"
Edit "/etc/initramfs-tools/modules", adapt to your resolution, example with 1280x720:
uvesafb mode_option=1280x720-24 mtrr=3 scroll=ywrap
GRUB_CMDLINE_LINUX_DEFAULT="quiet splash nomodeset video=uvesafb:mode_option=1280x720-24,mtrr=3,scroll=ywrap"

GRUB_GFXMODE="1280x720"
sudo update-grub
sudo update-initramfs -u
Reboot and voila, you've got the XBMC boot screen logo ^^
Create the script "fixbootsplash.sh" with the following content:
#! /bin/bash
# Fix Ubuntu Plymouth Boot Splash
# if entry exists for $vt_handoff use sed to search and replace
# write to tmp file - move to original

checkVT=$(grep -c "\$vt_handoff" /boot/grub/grub.cfg)

if [ ! "$checkVT" -eq "0" ]
then
echo "> Found vt_handoff removing ..."
sudo sed 's/$vt_handoff//g' /boot/grub/grub.cfg > /tmp/.grub.cfg
sudo mv /boot/grub/grub.cfg /boot/grub/grub.cfg.backup
sudo mv /tmp/.grub.cfg /boot/grub/grub.cfg
fi

echo "> Done"
Make it executable:
sudo chmod +x fixbootsplash.sh
And execute:
sudo ./fixbootsplash.sh
Reboot and that should work, remember to execute this every grub update.
For more explanation, see Nick's comment in date of December 30, 2012 3:38 PM

sudo add-apt-repository ppa:danielrichter2007/grub-customizer && sudo apt-get update && sudo apt-get install -y grub-customizer
Open grub-customizer and set the grub splashcreen, go to preference and set the splashcreen:

See for reference: http://forum.xbmc.org/showthread.php?tid=116996&pid=1093119#pid1093119
[Actions for xbmc user]
Identity=unix-user:xbmc
Action=org.freedesktop.upower.*;org.freedesktop.consolekit.system.*;org.freedesktop.udisks.*
ResultAny=yes
ResultInactive=yes
ResultActive=yes
sudo adduser xbmc users
# Start at sdb to avoid system harddrive.
KERNEL!="sd[b-z][0-9]", GOTO="media_by_label_auto_mount_end"

# Import FS infos
IMPORT{program}="/sbin/blkid -o udev -p %N"

# Get a label if present, otherwise specify one
ENV{ID_FS_LABEL}!="", ENV{dir_name}="%E{ID_FS_LABEL}"
ENV{ID_FS_LABEL}=="", ENV{dir_name}="usbhd-%k"

# Global mount options
ACTION=="add", ENV{mount_options}="relatime"
# Filesystem-specific mount options
ACTION=="add", ENV{ID_FS_TYPE}=="vfat|ntfs", ENV{mount_options}="$env{mount_options},utf8,gid=100,umask=002"

# Mount the device
ACTION=="add", RUN+="/bin/mkdir -p /media/%E{dir_name}", RUN+="/bin/mount -o $env{mount_options} /dev/%k /media/%E{dir_name}"

# Clean up after removal
ACTION=="remove", ENV{dir_name}!="", RUN+="/bin/umount -l /media/%E{dir_name}", RUN+="/bin/rmdir /media/%E{dir_name}"

# Exit
LABEL="media_by_label_auto_mount_end"
Step 2: Install some requirements
If you installed a full desktop version (Xubuntu, Lubuntu...):
sudo apt-get install ssh python-software-properties udisks upower xorg alsa-utils mesa-utils git-core librtmp0 lirc libmad0 lm-sensors lib32gcc1 libc6-i386 dkms libbluray1
If you installed Ubuntu Minimal:
NB : For lirc, when wizard asks you to choose your hardware in our case we will configure it later so you can choose none... If you already know how to configure lirc and your hardware you may want to choose the right one.
sudo apt-get install ssh python-software-properties udisks upower xorg alsa-utils mesa-utils git-core librtmp0 lirc libmad0 lightdm lightdm-gtk-greeter lm-sensors dpkg-dev debhelper execstack dh-modaliases libqtgui4 libbluray1
NB : For lirc, when wizard asks you to choose your hardware in our case we will configure it later so you can choose none... If you already know how to configure lirc and your hardware you may want to choose the right one.
Step 3: Install ATI proprietary driver (required for XVBA Hardware acceleration)
Important Note about ATI Catalyst Driver versions, extract from XBMC XVBA main thread:
See: http://forum.xbmc.org/showthread.php?tid=116996&page=213Every driver after 12.11 (xorg 1.12 only) and 12.9Quantal(xorg 1.13 shipped with Ubuntu 12.10) is broken. It causes 100% CPU usage with enable vsync.There is currently no driver that can be installed for Ubuntu 13.04 - don't use this version.Currently you have the choice to use Ubuntu 12.04 and manually install Catalyst 12.11. Alternatively you can install 12.10 and keep the provided driver (fglrx 9.0.0ubuntu3). Ubuntu 13.04 ships with Catalyst 13.1 that is broken, Catalyst 13.4 is also broken. Every other Catalyst release / beta since then is also affected.In short: Don't use Ubuntu Raring.
Installation:
To install ATI driver, you will have 2 possibilities, installing the driver using official Ubuntu repository or installing the Catalyst driver manually downloaded from AMD.
My preference is to use to manual way as i want to be certain to use the version i decided, and also i want to keep the control on it, but both solutions are ok.
Edit 10/22/2012 - Non anymore supported Radeon HD (previous to HD5000): ATI does not support anymore graphic component previous to HD5000 (eg. Radeon HD4200, 4800...)
If you have one, please Go to memorandum "Install Catalyst Legacy for non supported ATI cards) at the end of this post
Using Ubuntu Repository packages:
NOT RECOMMENDED for Ubuntu 12.04 TLS
RECOMMENDED for Ubuntu 12.10 TLS (don't use this with graphic cards previous to HD5000)
Installing ATI proprietary driver using Ubuntu package:
Real simple, just use:
sudo apt-get install fglrx
Then execute configuration. (see above)
Under Ubuntu 12.10, you can consider this method with no problem. (still you can also choose the above manual installation)
Manual installation:
RECOMMENDED for Ubuntu 12.04 TLS
USELESS for Ubuntu 12.10 TLS
Installing ATI proprietary driver manually (Recommended):
*** Important remark ***
A small history of recent Catalyst releases:
- Catalyst 12.6 : Works fine but has issue with missing graphic cards reference, needs to overwrite signature file with 12.4 signature
Any version after 12.11 is bugged and will generate a CPU Overload, don't use it as for now.
For a fresh install (eg. the first time you install ATI driver on your system):
For Ubuntu 12.04 TLS:
I recommend ATI Catalyst 12.10:
Quantal Beta version: ATI Catalyst Version 12.9
Don't use this method with Ubuntu 12.10 (use the repository method version above), this method is for Ubuntu 12.04:
Beta Release (use at your own risk, but known to be good) - ATI Catalyst Version 12.9 BETA (Ubuntu Quantal Version, updated September 2012):
Thanks to Fritsch! ^^
Then execute configuration. (see above)
Official Release: ATI Catalyst Version 12.8 (Release Version):
Then execute configuration. (see above)
*** PAY ATTENTION: STOP X11 before applying ATI config - Required if you use Desktop Version ***
Edit 24/09/2012: If you still have borders scan issues, go to:
http://wiki.cchtml.com/index.php/Configuring
Restart X11 or (better) reboot
If this is not a fresh install and you already have a previous Catalyst version installed (eg. Upgrade from 12.6 for example), you have 2 options:
1. Upgrading packages (if hopefully you installed the driver by the recommended way to generate packages ^^)
Note: you can have a small issue with version of driver shown by amdcccle but easy to solve
To upgrade installed packages by the new one you just generated, just follow the normal installation and restart X11 if started.
When you open amdcccle, if you see the previous Catalyst version shown as installed, just remove "/etc/ati/amdpcsdb" and restart X11 (you will lose custom settings such as brightness, etc...)
If you re-open amdcccle, the new driver version will be correctly shown.
2. Totally remove and clean ATI and install the new version
Note: you will loose your custom settings unless to backup and restore "/etc/ati/amdpcsdb"
*** Important remark ***
A small history of recent Catalyst releases:
- Catalyst 12.6 : Works fine but has issue with missing graphic cards reference, needs to overwrite signature file with 12.4 signature
- Catalyst 12.8 : has XVBA broken
- Catalyst 12.9 official Beta : Suspend broken
- Catalyst 12.9 Quantal : Works good
- Catalyst 12.10 official release: Said to be the better for 12.04
- Catalyst 12.11 official release: Works good
- Catalyst 12.11 official release: Works good
For Ubuntu 12.04 TLS:
I recommend ATI Catalyst 12.10:
Official Release: ATI Catalyst Version 12.10 (Release Version):
- Download, Build packages and install 12.10 Driver:
cd ~/; mkdir catalyst12.10; cd catalyst12.10/
wget http://www2.ati.com/drivers/linux/amd-driver-installer-catalyst-12.10-x86.x86_64.zip
unzip amd-driver-installer-catalyst-12.10-x86.x86_64.zip
chmod +x amd-driver-installer-*.run
sudo sh ./amd-driver-installer-*.run --buildpkg
sudo dpkg -i fgl*.deb
Quantal Beta version: ATI Catalyst Version 12.9
Don't use this method with Ubuntu 12.10 (use the repository method version above), this method is for Ubuntu 12.04:
Beta Release (use at your own risk, but known to be good) - ATI Catalyst Version 12.9 BETA (Ubuntu Quantal Version, updated September 2012):
Thanks to Fritsch! ^^
- Download, Build packages and install 12.9 BETA Driver using Quantal sources packages:
sudo apt-get install xserver-xorg-dev
mkdir catalyst_12.9_quantal_ubuntu3 && cd catalyst_12.9_quantal_ubuntu3
mkdir tmp && cd tmp
wget http://archive.ubuntu.com/ubuntu/pool/restricted/f/fglrx-installer/fglrx-installer_9.000.orig.tar.gz
wget http://archive.ubuntu.com/ubuntu/pool/restricted/f/fglrx-installer/fglrx-installer_9.000-0ubuntu3.debian.tar.gz
tar xvfz fglrx-installer_9.000.orig.tar.gz
tar xvfz fglrx-installer_9.000-0ubuntu3.debian.tar.gz
mv *.tar.gz ../
dpkg-buildpackage -us -uc
cd ../
sudo dpkg -i *.deb
Then execute configuration. (see above)
Official Release: ATI Catalyst Version 12.8 (Release Version):
- Download, Build packages and install 12.8 Driver:
cd ~/; mkdir catalyst12.8; cd catalyst12.8/
wget http://www2.ati.com/drivers/linux/amd-driver-installer-12-8-x86.x86_64.zip
unzip amd-driver-installer-12-8-x86.x86_64.zip
chmod +x amd-driver-installer-8.982-x86.x86_64.run
sudo sh ./amd-driver-installer-8.982-x86.x86_64.run --buildpkg
sudo dpkg -i fgl*.deb
Then execute configuration. (see above)
Configuration:
*** PAY ATTENTION: STOP X11 before applying ATI config - Required if you use Desktop Version ***
Go in terminal using SSH from another computer or by switching to local console (CTRL+ALT+F1)
Don't stay under the desktop as stopping X11 will put you out :-)
If X11 is started, Stop X11:
Don't stay under the desktop as stopping X11 will put you out :-)
sudo service lightdm stop
sudo aticonfig --initial -f
sudo aticonfig --sync-vsync=on
sudo aticonfig --set-pcs-u32=MCIL,HWUVD_H264Level51Support,1
Black borders:
Optional : Depending on your configuration and TV / Screen, you could have black borders and XBMC does not fit the screen, then try to disable Underscan:
Optional : Depending on your configuration and TV / Screen, you could have black borders and XBMC does not fit the screen, then try to disable Underscan:
sudo aticonfig --set-pcs-val=MCIL,DigitalHDTVDefaultUnderscan,0
Edit 24/09/2012: If you still have borders scan issues, go to:
http://wiki.cchtml.com/index.php/Configuring
Restart X11 or (better) reboot
For an upgrade from previous Catalyst version:
If this is not a fresh install and you already have a previous Catalyst version installed (eg. Upgrade from 12.6 for example), you have 2 options:
1. Upgrading packages (if hopefully you installed the driver by the recommended way to generate packages ^^)
Note: you can have a small issue with version of driver shown by amdcccle but easy to solve
To upgrade installed packages by the new one you just generated, just follow the normal installation and restart X11 if started.
When you open amdcccle, if you see the previous Catalyst version shown as installed, just remove "/etc/ati/amdpcsdb" and restart X11 (you will lose custom settings such as brightness, etc...)
If you re-open amdcccle, the new driver version will be correctly shown.
2. Totally remove and clean ATI and install the new version
Note: you will loose your custom settings unless to backup and restore "/etc/ati/amdpcsdb"
To completely remove
- Stop X11 and go in terminal with ssh or console: sudo service lightdm stop
- Uninstall any previous package: sudo apt-get remove --purge xorg-driver-fglrx fglrx*
Note: In my system, apt-get will aslso remove "xbmc" package (and not xbmc-bin), just think to "sudo apt-get install xbmc" after you're done :-)
You won't loose any xbmc setting.
- And follow installation above
- When you open amdcccle, if you see the previous Catalyst version shown as installed, just remove "/etc/ati/amdpcsdb" and restart X11 (you will lose custom settings such as brightness, etc...)
Step 4: Proceed with XBMC installation using pre-compiled packages built for ATI
Edit March 5, 2013: Frodo is now officially released, don't choose Eden version unless you really have a reason for this
Install the ppa:
Choose the ppa correspoding to your needs:
RECOMMENDED:
Installation:
Update and install:
This procedure will add a ppa containing pre-compiled XBMC versions with XVBA support and install XBMC.
- xbmc-xvba-eden: Stable Eden version, H264 Level5.1 fix not included but supported (when you configured aticonfig in steps before) and Audio Engine not included
sudo add-apt-repository ppa:wsnipex/xbmc-xvba-eden
RECOMMENDED:
- xbmc-xvba: XBMC Stable Frodo Version (XBMC 12)
sudo add-apt-repository ppa:wsnipex/xbmc-xvba-frodo
- xbmc-xvba-testing: Frodo XVBA Testing Version, not recommended for normal users:
sudo add-apt-repository ppa:wsnipex/xbmc-xvba
Press enter to valid adding the ppa you choosed:
Installation:
sudo apt-get update$ sudo apt-get install xbmc xbmc-bin
edit /etc/security/limits.conf add the following line at the end of the file
xbmc - nice -1
If you installed Ubuntu Minimal, set the Xsession to automatically start with XBMC:
Install the Window Manager:
sudo apt-get install lightdm lightdm-gtk-greeter
sudo adduser xbmc video
sudo adduser xbmc audio
Edit /etc/lightdm/lightdm.conf:
[SeatDefaults]
autologin-user=xbmc
autologin-user-timeout=0
user-session=XBMC
greeter-session=lightdm-gtk-greeter
Check the content of /usr/share/xsessions/XBMC.desktop, should be:
[Desktop Entry]
Name=XBMC
Comment=This session will start XBMC Media Center
Exec=xbmc-standalone
TryExec=xbmc-standalone
Type=Application
If you installed a desktop version (Xubuntu, Lubuntu), set your session to automatically start with XBMC:
- Go to your session configuration and add a entry that simply calls "xbmc" command
Reboot or start lightdm (sudo service lightm start).
Step 5: First start of XBMC and base configuration
Step 5.a: Proceed to base settings
- Open XBMC
- In Appearance / skin, I recommend “AEON NOX” (In my opinion the better theme!)
Note about CPU usage under Aeon Nox (and potentially various themes):
Keep in mind that any advanced theme like Aeon Nox will consume more CPU than the default confluence XBMC theme.
I don't feel it as a problem, but more as poor price to pay when you want to have various advanced options, functions and want to get a wonderful media center solution.
My XBMC box (a Zotac AD02, not a real powerful computer in itself but very great at this job) is running 24 hours a day and also hosts various services (Apache instances, Splunk server, Observium, Owncloud and Ajaxplorer, sabnzbd and others) and it's working so good even with an high CPU load.
You should not be afraid about having an high CPU load with XBMC, it will still be very fluid and doesn't have anything to matter with Video Quality or decoding... (Which will uses the GPU thanks to hardware acceleration)

- In Appearance, adapt your language if required

- In System->Settings->System->Video Settings:
Vertical Sync: Always on

- In System ->Video->Playback:
XVBA: On
Adjust Refreshrate to match video: On
Sync Playback to Display: On
Sync Method: Video Clock (Drop/Dupe)

Step 5.b: Install Network Manager (Optional)
Manage your WIFI connection with Network Manager:
With XBMC Addon "Network Manager", you can manage your Wifi setup directly inside XBMC, this may be very useful if you installed Ubuntu Minimal as you don't directly have a desktop available.
Note: For Ubuntu Minimal, see above and ensure you installed Network Manager
To set it up, open the addon in addon page.
Step 5.c: Access ATI graphical configuration tool (amdcccle) inside XBMC (Optional)
*** If you are using XFCE as the Window Manager (eg. under Xubuntu) you have to deactivate compositing (settings > Window Manager tweaks > Disable compositing) ***
This optional but if you installed Ubuntu Minimal (and even with desktop versions), it is very useful to be able to easily access to amdcccle directly inside XBMC.
- First authorize your XBMC user to launch amdcccle as root and without having to provide root's password:
Add sudo right using visudo:
sudo visudo
Add this line, save and exit:
xbmc ALL=(ALL) NOPASSWD: /usr/bin/amdcccle
Create a simple shell script "amdcccle.sh" that will be used by advanced launcher:
#!/bin/sh
sudo amdcccle
Make it executable:
chmod +x ~/Scripts/amdcccle.sh
- Install the addon "Advanced Launcher" (addon / program addons)
Note: You can manually create the launcher using Advanced Launcher, just ensure not to let any command argument (provided by default).
I feel more simple to use the configuration file i provide but this is optional...
create addon dir if does not exists yet:
mkdir -p ~/.xbmc/userdata/addon_data/plugin.program.advanced.launcher
create the file "launcher.xml" with the following content:
edit: "~/.xbmc/userdata/addon_data/plugin.program.advanced.launcher/launchers.xml" and adapt "MY VOLUME":
<?xml version="1.0" encoding="utf-8" standalone="yes"?>
<launchers>
 <launcher>
  <id>572f03d76458b1443b3afbf56ce62266</id>
  <name>amdcccle</name>
  <application>MY_VOLUME/amdcccle.sh</application>
  <args></args>
  <rompath></rompath>
  <thumbpath></thumbpath>
  <fanartpath></fanartpath>
  <custompath></custompath>
  <romext></romext>
  <platform>3DO</platform>
  <thumb></thumb>
  <fanart></fanart>
  <genre></genre>
  <release></release>
  <publisher></publisher>
  <launcherplot></launcherplot>
  <minimize>true</minimize>
  <lnk></lnk>
  <roms>
  </roms>
 </launcher>
</launchers>
- Add your launcher to favorites (Go in addon / Advanced Launcher and right click add to favorites upon chromuim)
- Go to skin configuration: settings>skins
- Add a custom page and call it as you want, example: ATI CONFIG
- Set a nice wallpaper
- And test!
Result:


Enable Dirty Region Rendering (drastically reduces CPU load on XBMC idle) and DDS Fanart NOTE: do not do this as root or with sudo. this file must belong to your normal xbmc user
create: ~/.xbmc/userdata/advancedsettings.xml
<advancedsettings>
   <loglevel hide="false">0</loglevel>
  <cputempcommand>sensors|sed -ne "s/temp1: \+[-+]\([0-9]\+\).*/\1 C/p"</cputempcommand>
  <gputempcommand>/usr/bin/aticonfig --od-gettemperature | grep Temperature | cut -f 2 -d "-" | cut -f 1 -d "." | sed -e "s, ,," | sed 's/$/ C/'</gputempcommand>
  <gui>
    <algorithmdirtyregions>3</algorithmdirtyregions>
    <nofliptimeout>0</nofliptimeout>
  </gui>
<video>
  <latency>
    <delay>0</delay>
    <refresh>
      <min>23</min>
      <max>24</max>
      <delay>175</delay> <!-- set to zero or adjust if audio seems out of sync with 24p movies -->
     </refresh>
  </latency>
</video>
</advancedsettings>
Step 7: Configure Audio
First of all, know your system:
The first thing you have to do is to know your system and configuration.
So, begin to identify your sound interface references using the command line "aplay".
Method 1:
Using the command "aplay -L" (high case) will produce all required information, example:
With these commands, you can easily know what will be the interface reference you need to know, using the example above, if i want to use:
- HDMI for sound ouput, my interface should be "hdmi:CARD=Generic,DEV=0", identified by HD-Audio Generic, HDMI 0
- SPDIF for sound ouput, my interface should be "hw:CARD=SB,DEV=1", identified by HDA ATI SB, ALC892 Digital
Method 2:
Using the command "aplay- l" you can also identify your soundcard:
So, begin to identify your sound interface references using the command line "aplay".
Method 1:
Using the command "aplay -L" (high case) will produce all required information, example:
hdmi:CARD=Generic,DEV=0
    HD-Audio Generic, HDMI 0
    HDMI Audio Output
dsnoop:CARD=Generic,DEV=3
    HD-Audio Generic, HDMI 0
    Direct sample snooping device
.................
With these commands, you can easily know what will be the interface reference you need to know, using the example above, if i want to use:
- HDMI for sound ouput, my interface should be "hdmi:CARD=Generic,DEV=0", identified by HD-Audio Generic, HDMI 0
- SPDIF for sound ouput, my interface should be "hw:CARD=SB,DEV=1", identified by HDA ATI SB, ALC892 Digital
Method 2:
Using the command "aplay- l" you can also identify your soundcard:
**** Liste des Périphériques Matériels PLAYBACK ****
carte 0: Generic [HD-Audio Generic], périphérique 3: HDMI 0 [HDMI 0]
  Sous-périphériques: 1/1
  Sous-périphérique #0: subdevice #0
carte 1: SB [HDA ATI SB], périphérique 0: ALC892 Analog [ALC892 Analog]
  Sous-périphériques: 1/1
  Sous-périphérique #0: subdevice #0
carte 1: SB [HDA ATI SB], périphérique 1: ALC892 Digital [ALC892 Digital]
  Sous-périphériques: 1/1
  Sous-périphérique #0: subdevice #0
You interfaces would also be accessible through (most cases):
- HDMI: plughw:0,3
- SPDIF: plughw:1,1
If you are using "xbmc-xvba-eden":
The Audio Engine isn't included in Eden version, so you will have to set the device using custom device with the interface reference you got above.
The old way was to create a custom sound configuration file (.asoundrc) containing required information and then set XBMC to use this custom interface.
This is not required anymore with Eden, you can now set it using the reference you got using the command line "aplay".
For references only, i let 2 examples of asoundrc for Zotac-AD02 using SPDIF and Zotac-AD10 using HDMI. (you can still choose this option if can't get the sound to work with the new method)
THE OLD WAY:
Restart XBMC, in Settings>System>Audio Output:
THE NEW WAY:
Get your interface reference (using aplay, see above), and set XBMC correctly.
Adapt to your configuration: 2.0 or 5.1 sound system, AC3 / DTS capable device...
UNLESS YOU NEED IT, you should uninstall pulseaudio to avoid some problems
To uninstall pulseaudio:
Recommended Method using "plughw" devices: (there is other methods but this is the one i recommend and works the best)
If you don't get to work that way, try using the 2nd method (that identifies your card using aplay -l):
Example HDMI:
Example SPDIF:
Note: If you don't get menu sounds that way, create the ".asoundrc" file as explained in the old way, you system will use default PCM for system sounds
Note:
If your connection between your TV and your sound system is not numerical (usually SPDIF), you probably have to use 2.0 speaker configuration and analogic instead of optical/HDMI
The Audio Engine isn't included in Eden version, so you will have to set the device using custom device with the interface reference you got above.
The old way was to create a custom sound configuration file (.asoundrc) containing required information and then set XBMC to use this custom interface.
This is not required anymore with Eden, you can now set it using the reference you got using the command line "aplay".
For references only, i let 2 examples of asoundrc for Zotac-AD02 using SPDIF and Zotac-AD10 using HDMI. (you can still choose this option if can't get the sound to work with the new method)
THE OLD WAY:
Zotac-AD02 using SPDIF (As xbmc user, create a new file in your home: ~/.asoundrc)
pcm.dmixer {
    type dmix
    ipc_key 1024
    slave {
        pcm "hw:1,1"
        period_time 0
        period_size 1024
        buffer_size 8192
        rate 48000
     }
     bindings {
        0 0
        1 1
     }
}

pcm.!default {
   type plug
   slave.pcm "dmixer"
}
Restart XBMC, in Settings>System>Audio Output:
- Audio Output: Optical/Coax
- Speaker Configuration: 5.1
- Audio Output Device: Custom
- Custom Audio Device: plug:dmixer
- Passthrought Output Device: Custom
- Custom Passthrought Device: plug:dmixer
Zotac-AD10/AD11 using HDMI (As xbmc user, create a new file in your home: ~/.asoundrc)
pcm.dmixer {
   type dmix
   ipc_key 1024
   ipc_key_add_uid false
   ipc_perm 0660
   slave {
      pcm "hw:0,3"               #HDMI, defaults to 48000 kHz
      channels 2
      period_size 1024
      buffer_size 4096
   }
}

pcm.!default {
   type plug
   slave.pcm "dmixer"
}
Restart XBMC, in Settings>System>Audio Output:
- Audio Output: HDMI
- Speaker Configuration: 5.1
- Audio Output Device: Custom
- Custom Audio Device: plug:dmixer
- Passthrought Output Device: hdmi (alsa)
THE NEW WAY:
Get your interface reference (using aplay, see above), and set XBMC correctly.
Adapt to your configuration: 2.0 or 5.1 sound system, AC3 / DTS capable device...
UNLESS YOU NEED IT, you should uninstall pulseaudio to avoid some problems
To uninstall pulseaudio:
sudo apt-get remove pulseaudio
Recommended Method using "plughw" devices: (there is other methods but this is the one i recommend and works the best)
Example HDMI:
- Audio Output: HDMI or Optical (try both)
- Audio Output Device: Custom
- Custom Audio Device: plughw:0,3
- Passthrought Output Device: Custom
- Custom Passthrought Device: plughw:0,3
Example SPDIF:
- Audio Output: Optical
- Audio Output Device: Custom
- Custom Audio Device: plughw:1,1
- Passthrought Output Device: Custom
- Custom Passthrought Device: plughw:1,1
Note: If you don't get menu sounds that way, create the ".asoundrc" file as explained in the old way, you system will use default PCM for system sounds
Note:
If your connection between your TV and your sound system is not numerical (usually SPDIF), you probably have to use 2.0 speaker configuration and analogic instead of optical/HDMI
If you are using "xbmc-xvba" or "xbmc-xvba-testing":
The Audio Engine is included in the build, getting the sound to work should be much easier!
You can proceed the same way than above, or (perhaps better) use the integrated Audio Engine.
UNLESS YOU NEED IT, you should uninstall pulseaudio to avoid potential issues in Linux
sudo apt-get remove pulseaudio
You can identify your Alsa device references (hardware and sub-hardware) using the commande "aplay -l".
Then, i advice you to start XBMC and check the log file, you will see all devices scanned by the Audio Engine.
Launch XBMC and open your logfile "~/.xbmc/temp/xbmc.log", you will see something like that:
02:51:50 T:140653859886976  NOTICE: Enumerated ALSA devices:
02:51:50 T:140653859886976  NOTICE:     Device 1
02:51:50 T:140653859886976  NOTICE:         m_deviceName      : @
02:51:50 T:140653859886976  NOTICE:         m_displayName     : Default (HDA ATI SB ALC892 Digital) ()
02:51:50 T:140653859886976  NOTICE:         m_displayNameExtra:
02:51:50 T:140653859886976  NOTICE:         m_deviceType      : AE_DEVTYPE_PCM
02:51:50 T:140653859886976  NOTICE:         m_channels        : FL,FR
02:51:50 T:140653859886976  NOTICE:         m_sampleRates     : 96000
02:51:50 T:140653859886976  NOTICE:         m_dataFormats     : AE_FMT_S16NE,AE_FMT_S16LE
02:51:50 T:140653859886976  NOTICE:     Device 2
02:51:50 T:140653859886976  NOTICE:         m_deviceName      : dmixer
02:51:50 T:140653859886976  NOTICE:         m_displayName     : HDA ATI SB ()
02:51:50 T:140653859886976  NOTICE:         m_displayNameExtra: ALC892 Digital
02:51:50 T:140653859886976  NOTICE:         m_deviceType      : AE_DEVTYPE_PCM
02:51:50 T:140653859886976  NOTICE:         m_channels        : FL,FR
02:51:50 T:140653859886976  NOTICE:         m_sampleRates     : 96000
02:51:50 T:140653859886976  NOTICE:         m_dataFormats     : AE_FMT_S16NE,AE_FMT_S16LE
02:51:50 T:140653859886976  NOTICE:     Device 3
02:51:50 T:140653859886976  NOTICE:         m_deviceName      : hdmi:CARD=Generic,DEV=0
02:51:50 T:140653859886976  NOTICE:         m_displayName     : HD-Audio Generic
02:51:50 T:140653859886976  NOTICE:         m_displayNameExtra: HDMI
02:51:50 T:140653859886976  NOTICE:         m_deviceType      : AE_DEVTYPE_HDMI
02:51:50 T:140653859886976  NOTICE:         m_channels        : FL,FR
02:51:50 T:140653859886976  NOTICE:         m_sampleRates     : 32000,44100,48000
02:51:50 T:140653859886976  NOTICE:         m_dataFormats     : AE_FMT_S16NE,AE_FMT_S16LE
Upon this point if you know a little bit your hardware, it will really easy to set the device you will use inside XBMC.
In my example case (AD02 in SPDIF), i know my hardware is "hw1;1", so i can choose any device listed and related to this Hardware and test, i can also simply use the configured device in .asoundrc.
You also have to set the Audio Passthrough. (see above)
XBMC will automatically provide you available devices in the passthrough section, the choice should be easy enough.
NOTE as of 02/03/2013: ATI Catalyst driver isn't yet able to play HD (True HD and DTS-HD), so unset these 2 boxes
Note: if your are using a .asoundrc file, you will also see referenced devices.


Step 8: Configure power management to allow shutdown and others power management functions from XBMC
Edit 01/07/2013: Thanks to Nick, added config to allow extinction from power button pressure
Edit 09/29/2012: This does not seem to be required anymore with last update systems, try first to use Shutdown/Reboot from XBMC.
If it does not work, then follow these steps
Shutting down from XBMC:
Without configuring it, you should not be able to shutdown or suspend your system directly from XBMC
Source:
http://wiki.xbmc.org/index.php?title=HOW-TO:Suspend_and_wake_in_Ubuntu
Source:
http://wiki.xbmc.org/index.php?title=HOW-TO:Suspend_and_wake_in_Ubuntu
sudo apt-get install policykit-1 upower acpi-support
Edit 10/26/2012: Thanks to Lorenzo, correction for Ubuntu 12.10
For Ubuntu 12.04:
Create a new file "/var/lib/polkit-1/localauthority/50-local.d/custom-actions.pkla":
For Ubuntu 12.04:
Create a new file "/var/lib/polkit-1/localauthority/50-local.d/custom-actions.pkla":
[Actions for xbmc user]
Identity=unix-user:xbmc
Action=org.freedesktop.upower.*;org.freedesktop.consolekit.system.*;org.freedesktop.udisks.*
ResultAny=yes
ResultInactive=yes
ResultActive=yes
- Restart XBMC and try power management functions such as shutdown
For Ubuntu 12.10:
Create a new file "/etc/polkit-1/localauthority/50-local.d/xbmc_shutdown.pkla ":
[Actions for xbmc user]
Identity=unix-user:xbmc
Action=org.freedesktop.devicekit.power.*;org.freedesktop.upower.*;org.freedesktop.consolekit.system.*
ResultActive=yes
ResultInactive=yes
ResultAny=auth_admin
- Restart XBMC and try power management functions such as shutdown
You may have to do more configuration if you need wake up from USB connected devices, in my case with the Zotac AD10 and using remote control, i did not had to and powering up was working from remote control.
Suspend / Hibernate from XBMC:
Suspending or Hibernating does not always works, depends on your hardware and is still a cause of trouble as for now.
Edit 10/26/2012: Catalyst 12.9 Quantal Ubuntu version seems to correct suspend issue, if you plan to use this function think about using this Catalyst version
add a new file /etc/pm/sleep.d/99_fglrx
#!/bin/sh

case $1 in
     suspend|suspend_hybrid|hibernate)
        /usr/sbin/service lightdm stop
        /sbin/rmmod -f fglrx
        ;;

     resume|thaw)
        /sbin/modprobe fglrx
        /usr/sbin/service lightdm start
        ;;
esac
sudo chmod +x /etc/pm/sleep.d/99_fglrx
Allow system extinction from Power Button pressure
(See Nick comment in date of December 30, 2012 3:38 PM):
- Comment the line "action=/etc/acpi/powerbtn.sh" by adding #
- Add a new line: action=/sbin/poweroff
- Save
And finally execute:
sudo acpid restart
Edit 09/09/2012:
If you are planing to have multiple XBMC installation in your Network, you may be interested in sharing and syncing your Media Library.
Take a look at my article:
http://youresuchageek.blogspot.fr/2012/09/howto-xbmc-share-and-sync-your-media.html
I will present the way i do which is absolutely personal and you may want to do completely differently ^^
Probably you will have:
- One and probably various external storage
- Films, but also anime for kids, music videos, comics shows and so on...
Using the XBMC's library function associated with Smart Playlist, you will be able (assoiated with a scrapper) to automatically get film's pictures and information, so you absolutely need to organize all that.
You can have as for an example your film's library splitted in various external storage !
You can have as for an example your film's library splitted in various external storage !
I Recommend:
- Use the same directory organisation for each external storage, example:
You have a first external drive:
/media/EXTERNAL1/Multimedia/Films
/media/EXTERNAL1/Multimedia/Animes
And a second with the same organization:
/media/EXTERNAL2/Multimedia/Films
/media/EXTERNAL2/Multimedia/Animes
- For each Film or Video, create a dedicated Directory with the official name of the Film, example:
/media/EXTERNAL1/Multimedia/Films/Ironman 1
/media/EXTERNAL1/Multimedia/Films/Ironman 2
...
- In XBMC, Go To "Video", Scroll Down and open "Files"
- Add a Video Source for each Directory you want XBMC to scan and add to the Media Library
Follow theses instructions:
- Scroll Down and select the "themoviedb" as the scrapper
- Select automatic scan- Select Each video in a dedicated directory
- Valid and Valid scan now


I recommend deactivate defaults Home screens as they will mix all of your Media Library.
- In Settings>Skin, Deactivate view you don't need (such as Live TV if you don't have PVR)

- Create your own Smart Playlist, in the following example as i use different paths for each type of media, it will be really easy to separate them
Go back to "Video>Files" :
Scroll up to "...":

Select "Playlists":

Add your Smart Playlist:

Choose your criteria (such as the path's name) and to forget to select "Order by" whatever you want (by Title could be a good idea)

Go back to Settings>Skin and add your own Home screen for each category you want, example:
- Select a CUSTOM screen, activate and configure it

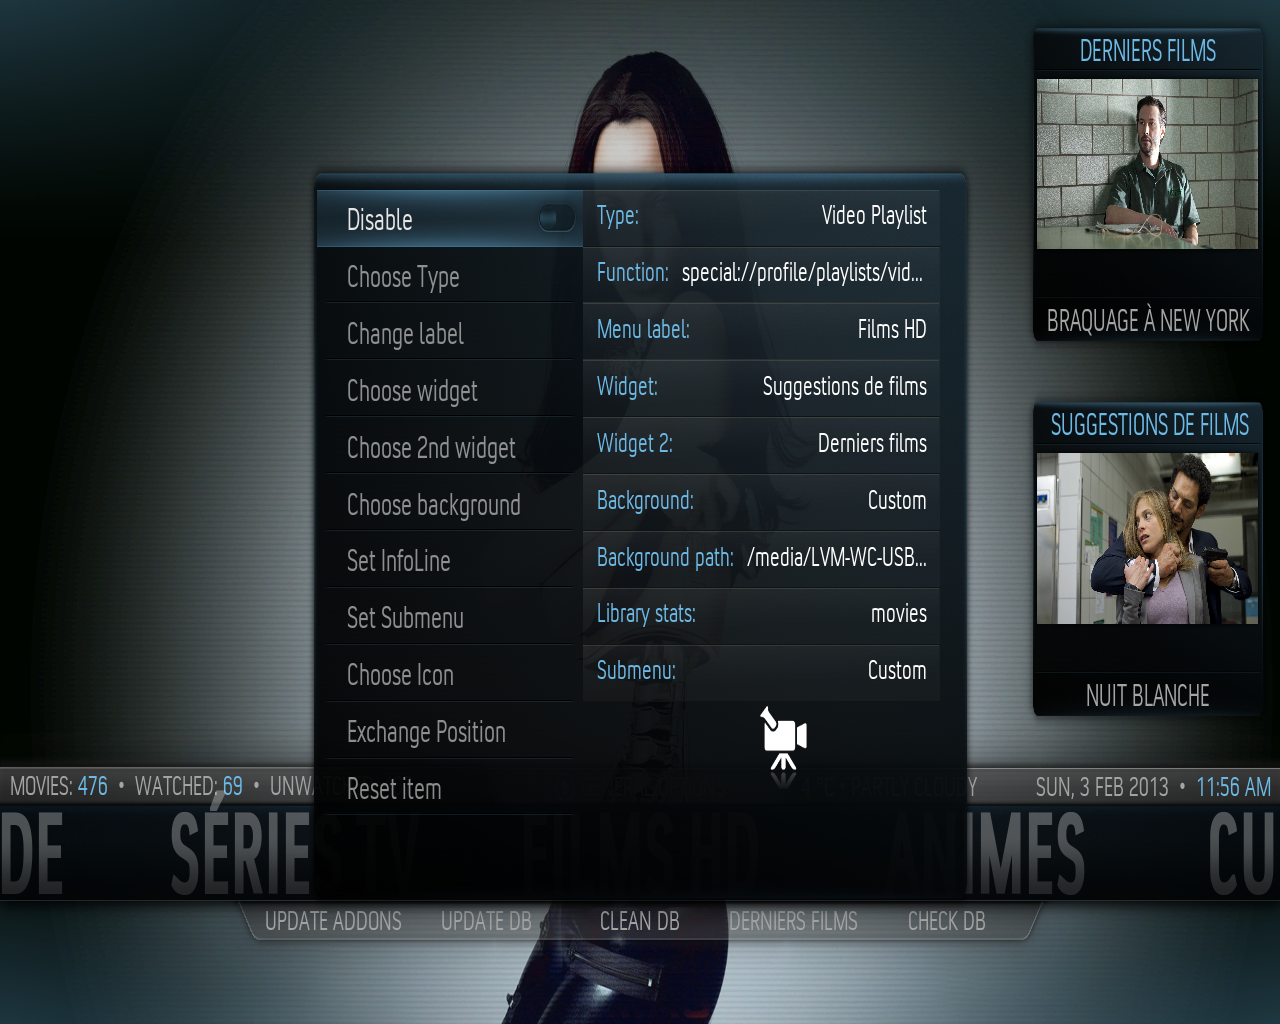
Also, I would recommend to configure Artwork Downloader addon to centralize your fanarts into a dedicated directory, and finally set it as the background image container for your custom views:


And set the background in your custom view ^^
Some screenshots:


So great no :-)
Addon "Missing Movie Scanner":
If you have a big Movie Library, you should consider about installing the addon "Missing Movie Scanner".
It will provide a way to check for each video media library source you set if files haven't been recognized by the scapper and are missing from your library.
When identified, you just have to correct folder names, retry scanning and double check missing files with this addon.
To install see:
http://forum.xbmc.org/showthread.php?tid=118263
http://code.google.com/p/xbmc-missing-movie-search/downloads/list
To use this addon, go to video>addons (scrol down in video to get addons) or directly inside the addon page.


Step 10 Optional: Integrate a Web Browser inside XBMC
*** ONLY WORKS WITH DESKTOP VERSION (requires a real Window Manager) ***
*** If you are using XFCE as the Window Manager (eg. under Xubuntu) you have to deactivate compositing (settings > Window Manager tweaks > Disable compositing) ***
For now this only fully works when XBMC has been launched inside a full Window Manager. (such as XFCE or LXCE which are parts of Xubuntu and Lubuntu)
I had some success running Firefox using flushbox and openbox inside an Ubuntu Minimal and directly running XBMC, but could never get the sound to work.
I you want to be able to use this (nice) feature, i recommend you to use a Desktop Ubuntu version, or a at least in Ubuntu Minimal to install XCFE or LXCE and running XBMC behind it.
How to proceed:
Using the addon "Advanced Launcher" we will create a dedicated screen that will launch our Web browser inside XBMC:
- First install the addon "Advanced Launcher" (go to addon page, more, and Programs Addons)
- In terminal, create a small bash script, as for an example:
create a directory for your launchers (adapt "MY VOLUME"):
mkdir <MY VOLUME>/launchers
create a simple shell script, in my example i want to launch chromium-browser (open version of chrome):
Note: If not yet installed, install chromium using "sudo apt-get install chromium-browser"
create a new file "<MY VOLUME>/launchers/chromium.sh" (adapt "MY VOLUME"):
#!/bin/sh
/usr/bin/chromium-browser -start-maximized http://www.google.fr
add execution right (adapt "MY VOLUME"):
chmod +x <MY VOLUME>/launchers/chromium.sh
- Create the launcher for our script:
Note: You can manually create the launcher using Advanced Launcher, just ensure not to let any command argument (provided by default).
I feel more simple to use the configuration file i provide but this is optional...
Note: If you followed Step 5.a (amdcccle), then the directory and configuration file already exist, you have to had a new launcher section inside <launchers> </launchers>.
create addon dir if does not exists yet:
mkdir -p ~/.xbmc/userdata/addon_data/plugin.program.advanced.launcher
create or replace if already exists the file "launcher.xml" with the following content:
edit: "~/.xbmc/userdata/addon_data/plugin.program.advanced.launcher/launchers.xml" and adapt "MY VOLUME":
<?xml version="1.0" encoding="utf-8" standalone="yes"?>
<launchers>
 <launcher>
  <id>572f03d76458b1443b3afbf56ce62267</id>
  <name>amdcccle</name>
  <application>MY_VOLUME/chromium.sh</application>
  <args></args>
  <rompath></rompath>
  <thumbpath></thumbpath>
  <fanartpath></fanartpath>
  <custompath></custompath>
  <romext></romext>
  <platform>3DO</platform>
  <thumb></thumb>
  <fanart></fanart>
  <genre></genre>
  <release></release>
  <publisher></publisher>
  <launcherplot></launcherplot>
  <minimize>true</minimize>
  <lnk></lnk>
  <roms>
  </roms>
 </launcher>
</launchers>
- Add your launcher to favorites (Go in addon / Advanced Launcher and right click add to favorites upon chromuim)
- Go to skin configuration: settings>skins
- Add a custom page and call it as you want, example: INTERNET
- Set a nice wallpaper
- And test!
Note about the sound in your Web Browser: To get the sound to work if you uninstalled pulseaudio (recommanded), ensure you set a default pcm device in your .asoundrc. (see sound section)
Final result:
When you will launch chromium browser, it will be opened in full page outside of XBMC.
When closing it, the system goes back automatically to XBMC.


Step 11: Integrate a file manager inside XBMC
*** ONLY WORKS WITH DESKTOP VERSION (requires a real Window Manager) ***
*** If you are using XFCE as the Window Manager (eg. under Xubuntu) you have to deactivate compositing (settings > Window Manager tweaks > Disable compositing) ***
I have tested it under Desktop Ubuntu versions, and it works perfectly :) (it has to be tested under Ubuntu minimal)
You can easily integrate access to the file manager of your choice and manage your access to it directly inside XBMC, that you can manage your files without having to quit XBMC (if you use a desktop version) or have to deal with command line or anything else.
I've tested some file manager, i found pcmanfm (Lubuntu's file manager) working real great in this situation. (could not get thunar to maximize when ran from XBMC...)
Install pcmanfm:
chmod +x <MY VOLUME>/launchers/chromium.sh
#!/bin/bash
pcmanfm
Then see Step 5.a and 10 to see how to add this script in Advanced Launcher, and then create your home page.
Result:

When opened, pcmanfm will maximize until you close it, the you come back to XBMC maximized.
UPnP: Share your Media Library with any other device
In a few words, UPnP will allow to share and access to your Media Library from any other UPnP aware device.
You may have a connected TV or Home Cinema and DLNA aware, you will be able to play any media from your library using your network!
Please note UPnP server in XBMC is still under construction and may need to be improved, if you are looking for an alternative, take a look at MiniDLNA:
http://youresuchageek.blogspot.fr/2012/09/how-to-linux-setup-simple-and-powerful.html
Please note UPnP server in XBMC is still under construction and may need to be improved, if you are looking for an alternative, take a look at MiniDLNA:
http://youresuchageek.blogspot.fr/2012/09/how-to-linux-setup-simple-and-powerful.html
First, enable UPnP in System>Network>Services:


And... Really that's all !!! ^^
Just ensure your TV, Home Cinema, other device running XBMC, even your Ipad (and perhaps soon your fridge) is well connected to your Network and launch your DLNA explorer.
Any DLNA Server (when activating UPnP, XBMC is acting as a DLNA server) will be automatically detected and accessible, just browse and enjoy.
It took me around 2 minutes to access XBMC library and play video on my LG Home Cinema with absolutely no difficulties.
Airplay: Play your Music, Video or Pictures directly from your Iphone, Ipad or any Airplay aware device !
Any Apple addict may already know Airplay, Apple's remote protocol that allow you to wireless play your music and so on from your Apple device.
For that you had to buy an Apple Airport...this time is over thanks to XBMC Airplay implementation in Eden version! (real great work from XBMC developers!)
Install requirements:
Enable Airplay (deactivated by default) :

Any Apple addict may already know Airplay, Apple's remote protocol that allow you to wireless play your music and so on from your Apple device.
For that you had to buy an Apple Airport...this time is over thanks to XBMC Airplay implementation in Eden version! (real great work from XBMC developers!)
Install requirements:
sudo apt-get install avahi-daemon libshairport1
Enable Airplay (deactivated by default) :

And...that's it ^^ Take your Iphone while connected to your Wifi Network, open Music, Video or Picture and look for the Airplay icon, you'll find within a minute your XBMC!

And play whatever you want, Again enjoy ^^
ERROR: Unable to load libshairport.so.0, reason: libshairport.so.0: cannot open shared object file: No such file or directory
Correct with:
Then deactivate airplay and re-activate, retest and it should work ^^
*************************************
Control XBMC with a Web Interface:
You may also find amazing or useful to control XBMC through a Web page, activate the service and set credentials:

Open your Browser and access XBMC using the port you set, i recommend to take a look to other Web Interface available, example:


And play whatever you want, Again enjoy ^^
*** IMPORTANT INFORMATION!!! ***
Some updates seem have to broken airplay on my system, in case of trouble check your XBMX log (~/.xbmc/temp/xbmc.log), if you see this message:
ERROR: Unable to load libshairport.so.0, reason: libshairport.so.0: cannot open shared object file: No such file or directory
Correct with:
cd /usr/lib/x86_64-linux-gnu/ && sudo ln -s libshairport.so.1.0.0 libshairport.so.0
Then deactivate airplay and re-activate, retest and it should work ^^
*************************************
Control XBMC with a Web Interface:
You may also find amazing or useful to control XBMC through a Web page, activate the service and set credentials:

Open your Browser and access XBMC using the port you set, i recommend to take a look to other Web Interface available, example:

Step 13: Configure Remote Control
For Zotac MCE remote control (shipped with Nano AD10/AD11):
Updated 10/17/2012
The Zotac AD10 comes with an MCE remote control associated with an embedded IR receiver and also an optional USB IR receiver.
- With the internal IR receiver using builtin lirc
- With the external USB IR using Fermenta's HID driver
Try both methods, after having tested 2 x Zotac AD10 and 1 x Zotac AD11, i always had issues with the external IR receiver (crazy repeating keys) so this is my opinion but i definitively recommend using the internal IR receiver !
METHOD 1: Using the internal IR Receiver
I really want to thank Fritsch for sharing this howto, i've been looking for this to work for a while!
Note: That could seem evident, but don't plug the external USB IR ^^
Major references:
Install lirc:
sudo apt-get install lirc
When asked by the installator, juste say none.
Replace following configuration files:
/etc/lirc/hardware.conf
# /etc/lirc/hardware.conf
#
#Chosen Remote Control
REMOTE="zboxremote"
REMOTE_MODULES=""
REMOTE_DRIVER=""
REMOTE_DEVICE=""
REMOTE_SOCKET=""
REMOTE_LIRCD_CONF=""
REMOTE_LIRCD_ARGS=""

#Chosen IR Transmitter
TRANSMITTER="SIR IrDA (built-in IR ports)"
TRANSMITTER_MODULES=""
TRANSMITTER_DRIVER=""
TRANSMITTER_DEVICE="/dev/lirc0"
TRANSMITTER_SOCKET=""
TRANSMITTER_LIRCD_CONF=""
TRANSMITTER_LIRCD_ARGS=""

#Enable lircd
START_LIRCD="true"

#Don't start lircmd even if there seems to be a good config file
#START_LIRCMD="false"

#Try to load appropriate kernel modules
LOAD_MODULES="true"

# Default configuration files for your hardware if any
LIRCMD_CONF=""

FORCE_NONINTERACTIVE_RECONFIGURATION="false"
START_LIRCMD=""
/etc/lirc/lircd.conf
# /etc/lirc/lircd.conf
begin remote

  name  zboxremote
  bits            8
  flags RC6|CONST_LENGTH
  eps            30
  aeps          100

  header       2672   851
  one           457   425
  zero          457   425
  pre_data_bits   29
  pre_data       0x37FCB7B
  gap          106237
  toggle_bit_mask 0x8000
  rc6_mask    0x100000000

      begin codes
          KEY_SLEEP                0xC2
          KEY_WAKEUP               0x71
          KEY_RECORD               0xC8
          KEY_PAUSE                0xCF
          KEY_STOP                 0xCE
          KEY_REWIND               0xD6
          KEY_PLAY                 0xD3
          KEY_FASTFORWARD          0xD7
          KEY_PREVIOUS             0xDE
          KEY_NEXT                 0xDF
          KEY_BACK                 0x7C
          KEY_INFO                 0x34
          KEY_HOME                 0xA2
          KEY_UP                   0xA7
          KEY_DOWN                 0xA6
          KEY_LEFT                 0xA5
          KEY_RIGHT                0xA4
          KEY_OK                   0xA3
          KEY_VOLUMEDOWN           0xEE
          KEY_VOLUMEUP             0xEF
          KEY_MUTE                 0xF2
          KEY_CHANNELDOWN          0xE0
          KEY_CHANNELUP            0xE1
          KEY_1                    0xFE
          KEY_2                    0xFD
          KEY_3                    0xFC
          KEY_4                    0xFB
          KEY_5                    0xFA
          KEY_6                    0xF9
          KEY_7                    0xF8
          KEY_8                    0xF7
          KEY_9                    0xF6
          KEY_0                    0xFF
          KEY_KPASTERISK           0xCC
          KEY_KPSLASH              0xCD
          KEY_CLEAR                0xC5
          KEY_TEXT                 0xD0
          KEY_EPG                  0xC1
          KEY_ENTER                0xCB
          KEY_RED                  0x92
          KEY_GREEN                0x91
          KEY_YELLOW               0x90
          KEY_BLUE                 0x8F
      end codes

end remote
Some remappings for xbmc:
~/.xbmc/userdata/Lircmap.xml
~/.xbmc/userdata/Lircmap.xml
<lircmap>
    <remote device="zboxremote">
        <left>KEY_LEFT</left>
        <right>KEY_RIGHT</right>
        <up>KEY_UP</up>
        <down>KEY_DOWN</down>
        <select>KEY_OK</select>
        <start>KEY_HOME</start>
        <back>KEY_BACK</back>
        <record>KEY_RECORD</record>
        <play>KEY_PLAY</play>
        <pause>KEY_PAUSE</pause>
        <stop>KEY_STOP</stop>
        <forward>KEY_FORWARD</forward>
        <reverse>KEY_REWIND</reverse>
        <volumeplus>KEY_VOLUMEUP</volumeplus>
        <volumeminus>KEY_VOLUMEDOWN</volumeminus>
        <pageplus>KEY_CHANNELUP</pageplus>
        <pageminus>KEY_CHANNELDOWN</pageminus>
        <skipplus>KEY_NEXT</skipplus>
        <skipminus>KEY_AGAIN</skipminus>
        <mute>KEY_MUTE</mute>
        <power>KEY_SLEEP</power>
        <myvideo>KEY_VIDEO</myvideo>
        <mymusic>KEY_AUDIO</mymusic>
        <mytv>LiveTV</mytv>
        <one>KEY_1</one>
        <two>KEY_2</two>
        <three>KEY_3</three>
        <four>KEY_4</four>
        <five>KEY_5</five>
        <six>KEY_6</six>
        <seven>KEY_7</seven>
        <eight>KEY_8</eight>
        <nine>KEY_9</nine>
        <zero>KEY_0</zero>
        <red>KEY_RED</red>
        <green>KEY_GREEN</green>
        <yellow>KEY_YELLOW</yellow>
        <blue>KEY_BLUE</blue>
        <menu>KEY_DVD</menu>
        <clear>KEY_CLEAR</clear>
        <enter>KEY_ENTER</enter>
        <star>KEY_KPASTERISK</star>
        <hash>KEY_KPSLASH</hash>
        <title>KEY_WAKEUP</title>
        <teletext>KEY_TEXT</teletext>
        <guide>KEY_EPG</guide>
        <info>KEY_INFO</info>
    </remote>
</lircmap>
Some additional remaps:
~/.xbmc/userdata/keymaps/remap.xml
<keymap>
  <global>
    <remote>
      <power>ActivateWindow(ShutdownMenu)</power>
      <info>ContextMenu</info>
      <record>XBMC.ActivateWindowAndFocus(MyPVR, 34,0, 13,0)</record>
    </remote>
  </global>
  <fullscreenvideo>
      <remote>
           <info>CodecInfo</info>
       <back>Back</back>
           <select>OSD</select>
      </remote>
  </fullscreenvideo>
</keymap>
Reboot or manually start lirc (sudo /etc/init.d/lirc start) and relaunch XBMC, you're done!
Nb: I you have an error while trying to start lirc talking about impossibility to get staging/media, do (adapt to your current kernel version, use "uname -a" if you don't know it) :
sudo ln -s /lib/modules/3.2.0-32-generic/kernel/drivers/staging/media/lirc /lib/modules/3.2.0-32-generic/kernel/drivers/staging/lirc
METHOD 2: Using the external USB IR Receiver
Major references:
http://ben.periton.co.uk/2012/06/configuring-the-zotac-zbox-remote-control/
Note: I had some frustrating issues with the Howto above, so i'll provide the same version with some important mentions and corrections
http://forum.xbmc.org/showthread.php?tid=133071&page=2
Follow carefully theses steps:
- Plug the external USB IR receiver
- If "LIRC" is already installed (sudo dpkg -l | grep lirc), uninstall it:
sudo apt-get autoremove --purge lirc
- IMPORTANT TO AVOID ISSUES: Ensure the original LIRC init script does not exist:
sudo rm /etc/init.d/lirc
- Install some requirements:
sudo apt-get install automake dialog libtool
- IMPORTANT TO AVOID ISSUES: Avoid the kernel from loading the module "ite_cir" that manages the internal IR
Note: On some systems (i had the case under Xubuntu 12.04) if you don't do that you may go in great troubles with latency and crazy repeating keys when using the remote.
Edit "/etc/modprobe.d/blacklist.conf" and add the following line at the end of the file:
blacklist ite_cir
- Download and extract Fermenta's LIRC:
wget https://github.com/FernetMenta/lirc/tarball/master -O lirc.tar.gz
tar -xvf lirc.tar.gz
cd <EXTRACTED DIR>
- Configure and install, when running setup.sh, select driver zotac under usb, save & configure:
./autogen.sh
./setup.sh
make
sudo make install
- Create links in /usr/sbin:
cd /usr/sbin
sudo ln -s ../local/sbin/lircd lircd
sudo ln -s ../local/sbin/lircmd lircmd
- Set LIRC to launch at system startup (with good options) :
Create "/etc/udev/rules.d/85-xbmc.rules":
#Remote Control
SUBSYSTEM=="usb" , ATTRS{idVendor}=="0471", ATTRS{idProduct}=="20cc", SYMLINK+="remote", ACTION=="add", RUN+="/sbin/initctl --quiet emit --no-wait ir-ready"
Create "/etc/init/lirc.conf":
description "lirc"
emits "lirc-ready"
expect fork
start on (remote-filesystems
          and local-filesystems
      and started rsyslog
      and ir-ready)
stop on runlevel [!2345]

pre-start script
  while [ ! -e /dev/remote ]
  do
    sleep 1
  done
  mkdir /var/run/lirc
end script

exec /usr/local/sbin/lircd --driver=zotac --device=/dev/remote

post-start script
  ln -s /var/run/lirc/lircd /dev/lircd
end script

post-stop script
  rm /dev/lircd
  rm -rf /var/run/lirc
end script
- Stop X11 from registering the device as a keyboard:
*** IMPORTANT REMARK ***
In case you later upgrade your system, you really should ensure the file "/usr/share/X11/xorg.conf.d/10-evdev.conf" hasn't been overwritten.
If it has been overwritten, simply re-do the step bellow. (if you don't you will go in troubles)
Edit "/usr/share/X11/xorg.conf.d/10-evdev.conf" and add the following section at the beginning of the file:
Section "InputClass"
  Identifier "PHILIPS MCE USB IR Receiver- Spinel plus"
  MatchProduct "PHILIPS MCE USB IR Receiver- Spinel plus"
  MatchIsKeyboard "true"
  Option "Ignore" "true"
EndSection
- Configure several files as follow:
Replace "/etc/lirc/hardware.conf":
# hardware.conf for Zotac
#
REMOTE="Zotac MCE Remote"
REMOTE_MODULES=""
REMOTE_DRIVER="zotac"
REMOTE_DEVICE="/dev/remote"
REMOTE_SOCKET=""
REMOTE_LIRCD_CONF="zotac/lircd.conf"
REMOTE_LIRCD_ARGS=""
TRANSMITTER="None"
TRANSMITTER_MODULES=""
TRANSMITTER_DRIVER=""
TRANSMITTER_DEVICE=""
TRANSMITTER_SOCKET=""
TRANSMITTER_LIRCD_CONF=""
TRANSMITTER_LIRCD_ARGS=""
START_LIRCD="true"
LOAD_MODULES="true"
LIRCMD_CONF=""
FORCE_NONINTERACTIVE_RECONFIGURATION="false"
START_LIRCMD=""
Replace "/etc/lirc/lircd.conf":
# Please make this file available to others
# by sending it to
#
# this config file was automatically generated
# using lirc-0.9.1-git(zotac) on Mon Apr  2 14:10:29 2012
#
# contributed by
#
# brand:                       zotac.conf
# model no. of remote control:
# devices being controlled by this remote:
#

begin remote

  name  zotac.conf
  bits           32
  eps            30
  aeps          100

  one             0     0
  zero            0     0
  gap          100123
  min_repeat      9
#  suppress_repeat 9
#  uncomment to suppress unwanted repeats
#  toggle_bit_mask 0x7004F

      begin codes
          KEY_SLEEP                0x00010082
          KEY_WAKEUP               0x00010083
          KEY_RECORD               0x000C00B2
          KEY_PAUSE                0x000C00B1
          KEY_STOP                 0x000C00B7
          KEY_REWIND               0x000C00B4
          KEY_PLAY                 0x000C00B0
          KEY_FORWARD              0x000C00B3
          KEY_LEFTSHIFT            0x000C00B6
          KEY_RIGHTSHIFT           0x000C00B5
          KEY_BACK                 0x000C0224
          KEY_INFO                 0x000C0209
          KEY_MENU                 0xFFBC000D
          KEY_UP                   0x00070052
          KEY_LEFT                 0x00070050
          KEY_RIGHT                0x0007004F
          KEY_DOWN                 0x00070051
          KEY_OK                   0x00070028
          KEY_VOLUMEUP             0x000C00E9
          KEY_VOLUMEDOWN           0x000C00EA
          KEY_MUTE                 0x000C00E2
          KEY_CHANNELUP            0x000C009C
          KEY_CHANNELDOWN          0x000C009D
          KEY_1                    0x0007001E
          KEY_2                    0x0007001F
          KEY_3                    0x00070020
          KEY_4                    0x00070021
          KEY_5                    0x00070022
          KEY_6                    0x00070023
          KEY_7                    0x00070024
          KEY_8                    0x00070025
          KEY_9                    0x00070026
          KEY_0                    0x00070027
          KEY_NUMERIC_STAR         0x10070025
          KEY_NUMERIC_POUND        0x10070020
          KEY_CLEAR                0x00070029
          KEY_TEXT                 0xFFBC005A
          KEY_TITLE                0x000C008D
          KEY_ENTER                0x00070028
          KEY_RED                  0xFFBC005B
          KEY_GREEN                0xFFBC005C
          KEY_YELLOW               0xFFBC005D
          KEY_BLUE                 0xFFBC005E
      end codes

end remote
Create "~/.xbmc/userdata/Lircmap.xml" as your XBMC user:
<lircmap>
    <remote device="zotac.conf">
        <power>KEY_SLEEP</power>
        <wake>KEY_WAKEUP</wake>
        <record>KEY_RECORD</record>
        <pause>KEY_PAUSE</pause>
        <stop>KEY_STOP</stop>
        <reverse>KEY_REWIND</reverse>
        <play>KEY_PLAY</play>
        <forward>KEY_FORWARD</forward>
        <skipminus>KEY_LEFTSHIFT</skipminus>
        <skipplus>KEY_RIGHTSHIFT</skipplus>
        <back>KEY_BACK</back>
        <info>KEY_INFO</info>
        <start>KEY_MENU</start>
        <up>KEY_UP</up>
        <left>KEY_LEFT</left>
        <right>KEY_RIGHT</right>
        <down>KEY_DOWN</down>
        <select>KEY_OK</select>
        <volumeplus>KEY_VOLUMEUP</volumeplus>
        <volumeminus>KEY_VOLUMEDOWN</volumeminus>
        <mute>KEY_MUTE</mute>
        <up>KEY_CHANNELUP</up>
        <down>KEY_CHANNELDOWN</down>
        <zero>KEY_0</zero>
        <one>KEY_1</one>
        <two>KEY_2</two>
        <three>KEY_3</three>
        <four>KEY_4</four>
        <five>KEY_5</five>
        <six>KEY_6</six>
        <seven>KEY_7</seven>
        <eight>KEY_8</eight>
        <nine>KEY_9</nine>
        <red>KEY_RED</red>
            <green>KEY_GREEN</green>
            <yellow>KEY_YELLOW</yellow>
            <blue>KEY_BLUE</blue>
        <star>KEY_NUMERIC_STAR</star>
        <hash>KEY_NUMERIC_POUND</hash>
        <subtitle>KEY_TEXT</subtitle>
        <title>KEY_TITLE</title>
        <clear>KEY_CLEAR</clear>
    </remote>
</lircmap>
- REBOOT
And finally test your remote control, everything should be working like a charm!
For generic MCE remote controls:
For others generic MCE, please see my post:
http://youresuchageek.blogspot.fr/2012/07/mini-howto-xbmc-install-mce-remote.html
Step 14: Optional - Use Live TV
If you have an external TV Tuner, you may want to use it with XBMC and be able to watch Real TV on your Box.
This is very fun and will complete your XBMC Media Center Experience :-)
Please check my post here to see how to configure it:
http://youresuchageek.blogspot.fr/2012/07/xbmc-pvr-how-to-enhance-your-xbmc-media.html
Some screenshots ^^


Memorandum
- Configure ZOTAC Frame Buffer Size:
You have to set a very important setting in Zotac UEFI, if you don't you will get playback issue.
See:
http://openelec.tv/forum/117-xvba-amd/45194-solved-zotac-ad11-playback-problems
So to set this:
See:
http://openelec.tv/forum/117-xvba-amd/45194-solved-zotac-ad11-playback-problems
So to set this:
- Power on the Zotac and access to UEFI by pressing SUPPR key at boot time
- Go in screen "Chipset"
- Set UMA to 1Gb (default is 256Mb)


- Configure and install ATI Catalyst Legacy driver for non supported anymore Radeon HD cards (previous to HD5000)
1. Install the dependencies you need to build fglrx-legacy (libc6-i386 is only needed on 64 bit systems):
sudo apt-get install dh-make dh-modaliases execstack libqtgui4 build-essential libc6-i386
2. Remove any graphics drivers that are leftover on your system. Unless you have nvidia hardware, leave the nvidia part in the command as I discovered some packages had found their way on to my system (despite my not having installed them) and interfered with the ATI stuff until removed.
sudo apt-get remove fglrx* nvidia*
3. Download and extract the legacy drivers.
wget http://www2.ati.com/drivers/legacy/12-6/amd-driver-installer-12.6-legacy-x86.x86_64.zip
unzip amd-driver-installer-12.6-legacy-x86.x86_64.zip
4. Build and install the drivers. (They are not compatible with Ubuntu 12.10 (Quetzal) as of 21 Oct 2012.)
sudo sh amd-driver-installer-12.6-legacy-x86.x86_64.run --buildandinstallpkg
5. Stop the xserver via terminal. (Press Ctrl+Alt+F1 to load a terminal interface if need be)
sudo service lightdm stop
6. Configure the drivers as outlined in the guides that you referenced, reboot, and continue with the instructions from there.
sudo aticonfig --initial -f
sudo aticonfig --vs=on
sudo aticonfig --set-pcs-u32=MCIL,HWUVD_H264Level51Support,1
sudo reboot
Great article! Definitely learned a few things I didn't know about XBMC. I followed your instructions for using the Zotac MCE remote and it's not working. Not sure if I made a typo somewhere or what's happening. I am using XBMCBuntu. Not sure if anything is different vs the full OS.
ReplyDeleteHi,
DeleteThanks, Glad you enjoy :-)
For the Zotac Remote control, i haven't tested myself under XBMCUbuntu but i guess it should also work.
Some questions for your issue:
1.
Are you using the external USB IR Receiver ?
This solution only works with the external,the internal IR receiver will still be used but only to power on the system using the zotac remote.
2.
Have you had any error message during lirc installation or compilation ?
3.
Is lirc really started ?
Ensure lirc is really started ("ps -ef | grep lirc" should give you a result) and eventually try to restart it by hand (sudo /etc/init.d/lirc restart) and watch any failing message.
I noticed a recurrent issue under Ubuntu 12.04 even with ubuntu's lirc package, a directory location has changed in this kernel making lirc failing.
I you have message saying unable to access to a directory, correct by:
(cannot access /lib/modules/3.2.0-26-generic/kernel/drivers/staging/lirc: No such file or directory)
sudo ln -s /lib/modules/3.2.0-26-generic/kernel/drivers/staging/media/lirc
/lib/modules/3.2.0-26-generic/kernel/drivers/staging/lirc
And redo lirc installation.
Finally double check for any typo or copy / paste error, i could have done one too so you can also check configuration files on the source page i used for this part of my tutorial (http://ben.periton.co.uk/2012/06/configuring-the-zotac-zbox-remote-control/)
Last thing, system xorg upgrade could overwrite "/usr/share/X11/xorg.conf.d/10-evdev.conf" your remote would still work but really bad, check that in case of repeating key trouble :-)
Hope this helps !
Guilhem
Youresuchageek: Xbmc Install And Config Howto For Linux On Amd Graphic Based Systems (Fusion) - Xbmc Xvba >>>>> Download Now
Delete>>>>> Download Full
Youresuchageek: Xbmc Install And Config Howto For Linux On Amd Graphic Based Systems (Fusion) - Xbmc Xvba >>>>> Download LINK
>>>>> Download Now
Youresuchageek: Xbmc Install And Config Howto For Linux On Amd Graphic Based Systems (Fusion) - Xbmc Xvba >>>>> Download Full
>>>>> Download LINK Km
Fantastique, merci beaucoup
ReplyDeletePour l’instant je galère un peu a faire sortir du 5.1 vers mon ampli mais je sens qu'avec ton article je vais y arriver...
Merci avec plaisir :-) N'hésitez pas si je peux aider, je cherche également à améliorer la partie son (qui n'est pas des plus faciles...) tout feedback sera grandement apprécié!
DeletePour ma part, sur le AD02, connection en SPDIF vers un 5.1 LG, tout passe parfaitement quelque soit l'encodage et le niveau ^^ sauf pour les sons systèmes (un problème récent de conflit avec pulseaudio, ne pas hésitez à faire un "pulseaudio -k" en de problèmes avant de lancer XBMC et pour débugger, je travaille dessus)
Sur le AD10 (et en HDMI donc) la conf TV --> Homecinema ne me permet pas de vérifier dans l'immédiat pour le 5.1 mais ça devrait fonctionner
Je teste ca ce soir...
ReplyDeleteDans l'idéal j'aimerai pouvoir avoir une double sortie SPDIF vers l'ampli et HDMI vers la TV car mon ampli ne gère pas le passthrough HDMI, donc si je n'ai que du HDMI je dois avoir l'ampli toujours allumé
Sinon pas de pb avec pulsaudio puisqu'il n'est pas installé, j'ai une Ubuntu de base installé avec l'alternate CD, puis ensuite installation des package strictement nécessaires (Xorg, xbmc, alsa...)
Quand tout sera OK je ferais une note de blog qui devrait ressembler au tiens mais en Français et avec mon matos (bien sur je citerais cet article en source...)
Configuration effectué et miracle, j'ai du 5.1 en SPDIF, mon HDMI sort aussi du son (peu importe si c'est du 5.1 il est branché sur la TV), bref génial
ReplyDeleteMille merci
ET bravo pour ce blog que je découvre via XBMC et qui me semble très intéressant....
Nickel :-) Merci à vous!
Deletesalut.
Deletecomment as-tu résolu le problème de double sortie ?
Merci d'avance et surtout un enooooorme merci pour ce howto !
Salut, Merci beaucoup :-)
DeletePour la question à VoidAndAny, ma fois c'est une bonne question ^^ Mais je me demande quel peut être l'interêt d'avoir à la fois le son via SPDIF et HDMI ?
Nice HowTo, i fixed my ASIC hang by adding this kernelparameter: GRUB_CMDLINE_LINUX_DEFAULT="splash quiet noirqdebug irqpoll"
ReplyDeleteThanks! Really, i'll check your workaround and will integrate it in my Howto, thks for your comment :-)
DeleteGreat guide! I followed your guide and now my Fusion-based HTPC works flawlessly!
ReplyDeleteA question: to enable DDS fanart should you add the following line in advancedsettings.xml?
true
Sorry, this following line:
Delete< useddsfanart >true< / useddsfanart >
(without spaces)
Hi thank you :-)
DeleteThat's a good question, this is supposed to use GPU rendering for Fanart and others (http://wiki.xbmc.org/index.php?title=Userdata/advancedsettings.xml#.3Cuseddsfanart.3E) but may degrade performances on some systems.
I haven't tested myself yet, but i will, in actual config i feel XBMC being very fast, performer and great to use.
You should ask it on main fusion forum page: http://forum.xbmc.org/showthread.php?tid=116996
My tutorial is based on this work.
Guilhem
Hi,
ReplyDelete< useddsfanart >true< / useddsfanart >
DO NOT USE WITH Frod ( xbmc 12.0 ) its not used anymore.
Untrue,
Deletestill supported under Frodo, and on some systems that can handle this is it the recommended thing to do. From the current wiki:
"This settings allows XBMC to use your GPU rendering fanart and some other images. This will make loading images considerably faster, especially on systems with slower processors (e.g. Intel Atom based systems). Do not use this option on ARM based systems (Apple TV2/iOS/RPi/many Android systems) as it is likely to degrade performance because DDS images are not supported."
Hi, many thanks for the information and correction, very useful for my Raspberry Pi ARM article :-)
DeleteIn Eden ~/.asoundrc is no more required. Run sudo aplay -L (large l). You get an output like this:
ReplyDeleteplughw:CARD=PCH,DEV=0
HDA Intel PCH, Cirrus Analog
Hardware device with all software conversions
plughw:CARD=PCH,DEV=1
HDA Intel PCH, Cirrus Digital
Hardware device with all software conversions
hdmi:CARD=Generic,DEV=0
HD-Audio Generic, HDMI 0
HDMI Audio Output
You can set Custom output device to: device-name like this hdmi:CARD=Generic,DEV=0
Hi, tks for this, i will update this part as soon as i'll get back a real connection
DeleteHi, thanks for your guide.
ReplyDeleteI followed your instructions specifically for the remote as i have an ID80. unfortunately upon completion, my remote no longer functions at all. I cant figure out what is going on. is there anyway to wipe out the changes?
Hi, well that's strange...
DeleteAre you sure lirc is started ? also you should double check each configuration file...i've used this config several times and except a repeat key issue this works.
Finally, perhaps check on http://ben.periton.co.uk/2012/06/configuring-the-zotac-zbox-remote-control/ and double check config files, maybe i let an error in mine...
For sure, to revert changes, just revert any modification file you've made (delete those that was not existing), uninstall this lirc version (make uninstall).
Then i guess your config was using lirc with linux input layer, so just reinstall lirc and choose the linux input layer.
Yes i see, i'll follow the thread too, i'm curious to get the final result ^^
DeleteOne thing!
ReplyDeleteWhen installing the ATI driver (12.8)
The line:
$ chmod +x amd-driver-installer-12-6-x86.x86_64.run
is wrong as the file contained within the .zip is amd-driver-installer-8.982-x86.x86_64.run
Just thought you'd like to edit ;)
Hi, thanks!
DeleteAbsolutely right and corrected :-)
Hi, whats about HD Audio ?
ReplyDeleteTruHD and Dolby HD ?
Is there a Way to get it work ? or soon ?
thx 4 replay
Hi,
DeleteSee the XVBA's main thread in XBMC forum:
http://forum.xbmc.org/showthread.php?tid=116996&page=106
Post #1055 answers to your question.
For now and unfortunately, ATI can't do HD audio on Linux...
Nice guide. My grub 00_header is located in
ReplyDelete/etc/grub.d/00_header
not
/etc/boot/grub.d/00_header
Thank you, error corrected :-)
Deletebonjour,
DeleteMerci pour ce guide!
Juste une petite remarque sur grub, il me semble plus propre pour le dirty boot de plutot modifier /etc/default/grub et d'ajouter GRUB_RECORDFAIL_TIMEOUT=x car le /etc/boot/grub.d/00_header sous 12.10 permet déjà de surcharger le timeout de dirtyboot via la variable GRUB_RECORDFAIL_TIMEOUT
Bonjour!
DeleteAvec plaisir ^^ Merci beaucoup pour ta remarque c'était justement ce que je cherchais!!!
@+
Great guide. You saved my day! I'm using AD10+lubuntu+xbmc-xvba and I followed your guide religiously. My audio worked out the box inside xbmc but i cannot get it to work outside in the system. Any ideas? Also my CPU get about 40% load doing nothing but displaying xbmc menus even with the dirty region rendering. I am wondering what CPU load other people have experienced?
ReplyDeleteThanks a lot :-)
DeleteFor your sound to work in LXDE, 2 options:
- you install (reinstall if you uninstalled it) and set your config (HDMI / SPDIF) through the pulseaudio panel
- you create an ~/.asoundrc file (see the old method in my post), you system should use directly ALSA with default pcm
I would first recommend to try with Alsa
Using xbmc-xvba you should not have any issue with pulseaudio as it owns its own Audio Engine builtin, i previously observed conflict with xbmc-xvba-eden in SPDIF and optical when pulseaudio is installed and launched. (but eden had no sound engine builtin)
For CPU load this is normal, i observed almost the same CPU load in both AD02 and AD10, i recommend you to use "htop" or gnome monitor you should see that the load won't be that high on both cores.
Anyway, that's not an issue and not a problem for video decoding as xvba uses hardware acceleration using GPU and not CPU.
You should not get much more CPU load when playing video files, even HD.
In my config xbmc-xvba is very stable and can stay up and running with no issue for many days.
Thank you so much! Indeed the second method worked. My Zotac starts to resemble a normal PC now :). 40% load on CPU irritates me a bit (as the PC becomes noisier) so ended but setting up samba for sharing resources when i'm not using XBMC (I exit to OS) and then CPU usage is minimal 3-7%. I may try installing this newer BIOS in which you can setup larger memory allocation but I suspect this may not have noticeable effect in XBMC. I still have a couple of things I plan on fixing a) not working wifi (LAN works fine) b) sound crashes after some period of time (possibly inactivity). Any hints are very much appreciated!
DeleteYou're welcome :-)
DeleteCheck and upgrade your Bios version, i've read somewhere that old versions was generating more noises than last up to date when having some CPU usage.
If you want to improve your CPU usage, you could try to:
- deactivate RSS feeds (generates CPU usage)
- deactivate any non required system or application service (Cups and so on)
- try other skins and perhaps customize it
The Wireless interface should work out of the box, is your interface shown as up in your system ? (ifconfig / iwconfig and look for the interface)
Also if the good kernel module has been loaded, you should see a blue led in front of your Zotac.
If it's up, have you tried to configure your Wifi using Network Manager ? (do you see any SSID ?)
To be honest if you have the choice, you should keep using your LAN connection, that will always be more efficient and stable.
Moreover, i noticed not really good bandwidth using Wifi under Linux for this box...
I have not noticed any sound crash, you should post your issue on main XBMC xvba forum with XBMC debug log (put it on pastebin)
--> Ensure Pulseaudio is uninstalled, could be related
--> Does it only happens when you power off the TV or change HDMI connection ?, could be related to Catalyst driver (ensure you are using 12.8)
Thank you for your suggestions. As usual spot on :)
Delete1) Problem with wifi: The blue light was off so i figured out my kernel doesn't support the wifi card. I did some research and indeed that was the case. In the past Zotac used to ship atheros card and it worked out of the box. Now it ships RT2860 and this one doesn't work with Ubuntu 12.04. At least they provide the driver (you can also download from the manufacturer). I am copying my steps if you want to update the guide for the others in need:
$ wget http://downloads.zotac.com/mediadrivers/mb/download/NB087_WiFi_V2600_20120508.tar.gz
$ tar -zxvf NB*.tar.gz
$ sudo make
$ sudo make install
$ cd os/linux
$ insmod rt3290sta.ko
$ sudo reboot
After that everything started working and i could find my network in the network manager.
2. Sound crashes.
I did some tests and figured out this happens every time I turn the tv off. This reminded me of the issue with catalyst 12.04. I was sure i have the lasted driver because i installed from the ubuntu repositories via apt-get. And this assumption was wrong. Even after the update all you get is 12.4. So i used your guide and updated to 12.8 and everything works like a charm.
3. CPU load.
I'm not sure if 12.8 drivers helped or is it due to some xbmc update but now i'm getting much lower load. 7% doing nothing in XBMC, 35-50% playing full HD. I really love my AD10 now - works like a charm. When i was buying it - i was sure the machine has a lot going for it but people don't know how to configure. And that is true but thanks to your guide one can make a really bad ass htpc. God bless you and keep up the good work!
Thank you very much, i'm definitively proud my guide and i helped you, in my opinion sharing what we know and what we learned is definitively important ^^
DeleteI will integrate what you had to do for your Wireless interface to work, and also a more visible caution to prevent people from using apt-get to install Catalyst driver :-)
I just did the configuration of the remote and I think you may need one small correction. In step Replace "/etc/lirc/hardware.conf": while editing the file you have a line: REMOTE_LIRCD_CONF="zotac/lircd.conf.zotac" and this configuration file does not exist. You create lirc.conf later on so you probably wanted to point to REMOTE_LIRCD_CONF="zotac/lircd.conf
ReplyDeleteYou're definitely right, thanks a lot!
DeleteThanks for your guide but resume from suspend don't work for me (((
ReplyDeleteI'll take a look and will revert.
DeleteI usually prefer the system to be freshly started (or never stopped ^^) to avoid any playback issue (moreover if you have an internal SSD, starting up is done real quickly) so i haven't tested that too much...
Hi,
DeleteI've an SSD but I wish to use HTPC as "Media Server" than need to wake-up it from network: why must I have multiple XBMC at home if I need to manually switch on server every time?
Regards
Dario Toscano
Hi, i don't say you don't have to or can't use suspend on HTPC fusion systems, i'm just saying that i haven't tested that much, and that today with SSD, boot time does only require a few seconds more than waking up from suspend.
DeleteI'll check that ASAP :-)
Salut, merci pour ton guide ULTRA complet ! j'ai suivi pas à pas et tout a "presque" fonctionné :) Le "presque" c'est un très gros soucis : Lorsque je lance une vidéo HD XBMC se ferme. Sur de la vidéo SD ça fonctionne très bien.
ReplyDeleteJe suis sur une carte mère AMD Fusion E350 avec une carte graphique pci-e Radeon HD6450. Sous OpenElec tout fonctionne. J'ai installé les pilotes 12.9 beta comme indiqué dans la guide bien sur..
Je ne comprends pas d'ou peut venir ce plantage systématique. Si tu as une idée ?
Salut, oui c'est dommage :-)
DeleteQuelle version de xmbc xvba est installée ? (sudo dpkg -l | grep xvba)
Vérifie:
- Le contenu du fichier log : ~/.xbmc/temp/xbmc.log
il devrait y avoir des infos lorsque XBMC plante
- tente de passer sur le driver stable, Catalyst 12.8 (les 12.9 sont en Beta donc pas de "garantie"
- vérifie les options de playback dans XBMC, normalement :
In System ->Video->Playback:
XVBA: On
Adjust Refreshrate to match video: On
Sync Playback to Display: On
Sync Method: Video Clock (Drop/Dupe)
In System->Settings->System->Video Settings:
Vertical Sync: Always on
Il peux y arriver des cas de certaines cartes mères avec la mémoire partagée pour la vidéo ou il n'y a pas assez de Ram affectée (j'ai eu le cas sur un Zotac AD10) auquel cas il faut vérifier dans le bios si tu peux modifier le UMA frame buffer size pour affecter suffisamment de RAM pour la vidéo
En dernier lieu, si c'est toujours KO, active le mode debug, copie le contenu de ton log dans le pastbin.com et poste dans le forum de xbmc xvba (lien tout au début de mon guide)
Vérifie aussi de bien avoir fait la phase de configuration ATI:
Delete$ sudo aticonfig --initial -f
$ sudo aticonfig --sync-vsync=on
$ sudo aticonfig --set-pcs-u32=MCIL,HWUVD_H264Level51Support,1
tnx for the guide :)
ReplyDeletefor install amd driver 10.09 from quantal source for xubuntu, need all the package for minimal, + xserver-xorg-dev
thanks again
theSL
Hi, thanks :-)
DeleteThat's right, and will be corrected ^^
I have a big problem with smooth playback...
ReplyDeleteMy configuration is: Asrock E350M1, 4 GB DDR3, Lubuntu 12.04, Catalyst 12.9 Quantal, xbmc-xvba: Pre-Frodo Version (XBMC 12) with your settings (XVBA ON, Adjust Refreshrate On, etc)
I follow this gread guide.
I have an old Philips LCD TV (HD Ready, 1366x768 native resoultion, max 1080i input).
I plan to replace my Enigma2 Satellite receiver (Xtrend ET5000) with this mini PC. I need the smooth playback for the following filetypes: 1920x1080 50i H264, 720x576 50i H264, 720x576 50i mpeg2. I made a test video-pack with 3 files, you can download from: http://www.sendspace.com/file/umz76j
The playback is very jerky with interlaced artifacts with all three files, what should I do?
I think I need a native 1080i output, how do I set this up?
Hi, i think you probably have a problem related to default frame buffer size set by defaults in bios.
DeleteI don't know Asrock devices but i had the same issue with other some Zotac.
Check you have last Bios version and check in Bios a setting called UMA Frame Buffer size, change it from auto (or whatever it set) to the highest value possible, 1GB should be the best.
UMA Frame buffer size will set allocable RAM for the GPU
Forgot to say that your TV is not in caused, i have a 1080i HD Ready and can play anything without no issue (i'll try your files)
DeleteAlso ensure that when you configured ATI catalyst driver (atconfig commands) you were out X11 (using local console or remote SSH) and X11 was stopped
Thanks for your reply. The Asrock MB have max 512 MB UMA Frame Buffer size, and I set this before install Lubuntu. I started aticonfig from ssh.
ReplyDeleteI've tested you files, and i can play all files with no issues.
DeleteYou may have a configuration issue somewhere, was it a clean install ? can you check your XBMC version installed ? (sudo dpkg -l | grep xbmc)
Also check your ATI catalyst configuration using the command : "fglrxinfo"
Ensure you have no error reported with this command
I suggest you try OpenELEC (as a second system) to check if this is software or configuration related and not hardware related.
I have the same hardware as you have, anything can be played with no issue
Last advise, go to main XBMC XVBA forum thread, you'll find more people to help you:
http://forum.xbmc.org/showthread.php?tid=116996
I'm playing with xbmc settings...
DeleteWhen I switch "Sync Playback to Display" to Off, the playback is smooth, but the interlaced artifacts not disappears even in 1920x1080i mode. (The XBMC only shows 1920x1080p, but my HD Ready TV max input is 1920x1080i), so I think that is 1080i...
I know that, the AMD chip is not able to deinterlacing, but I will know how to properly display interlaced contents?
I find the xvba deinterlace option :)
DeleteI have smooth picture always, thanks for your help!
The xvba option is not working for mpeg2 contents? This is a hardware limitation?
Can say more on how you solved you issue ?
DeleteI followed this guide:
Deletehttp://www.computerbase.de/forum/showthread.php?t=882014
This version of xbmc + vdr is the best for me.
ok ^^
DeleteI just wanna thank you for a superb howto :D
ReplyDeleteMy Zotac AD10 is rocking xubuntu 12.10 and xbmc :D
Thanks :-) Glad you like!
DeleteI haven't yet fully tested it under 12.10, is there any correction required ? did you used Ubuntu minimal ?
First of all, thank you for this great guide!
ReplyDeleteI've installed xbmc-xvba under lubuntu 12.10 on a Asrock 350M1 board
All good excect for the xbmc idle shutdown function.
Xbmc quits but hangs in a lubuntu logout screen.
A working solution is to create the file "custom-actions.pkla" in
/etc/polkit-1/localauthority/50-local.d/ instead of
/var/lib/polkit-1/localauthority/50-local.d/
Hope it helps.
Lorenzo
Hi,
DeleteThanks ! And yes it does really helps :-)
Will integrate your comment ASAP
Cheers
sorry for the misunderstanding...
Deletelubuntu 12.10
file is
/etc/polkit-1/localauthority/50-local.d/xbmc_shutdown.pkla
[Actions for abc user]
Identity=unix-user:abc
Action=org.freedesktop.devicekit.power.*;org.freedesktop.upower.*;org.freedesktop.consolekit.system.*
ResultActive=yes
ResultInactive=yes
ResultAny=auth_admin
source: http://forums.gentoo.org/viewtopic-t-909950-highlight-.html
Thanks
Lorenzo
I'm using abc as username so change abc to xbmc
Delete[Actions for xbmc user]
Identity=unix-user:xbmc
sorry
Hi, no problem, corrected ^^
DeleteHi, I've installed XBMC FRODO BETA 1 in my Ubuntu 12.04 from ppa:team-xbmc/unstable repository.
ReplyDeleteNow in Video Playback Settings I dont have a XVBA option, but I have VDPAU and VAAPI. Are they the same but in newer versions? Must I install a XVBA specific build?
Thanks
Hi, XVBA is for AMD hardware only, Hardware acceleration with Catalyst AMD Driver.
DeleteIf you don't have an AMD GPU, then you don't need XVBA.
If you do, yes you must use XBMC XVBA ppa to install the XVBA flavor.
You should take a look at main XVBA forum thread, you will find all useful information.
Some extract in regard with your question:
Although the repository is called xbmc-xvba, as we started only with enabled xvba, this name is only there for historical reasons. The changes introduced by this xvba tree are in no way amd/xvba only.
After the first implementation of xvba was done, fernetmenta wanted to improve the whole xbmc architecture of handling surfaces. So he wrote a player that includes buffering and changed the design how VDPAU is working. This resulted in approx 10% better throughput and made stuff like 50p and 60p and the interlaced stuff with temporal / spatial working on hardware, that could not do this before.
Now with this improved architecture, xvba was ported to it. As a result we also included VDPAU in xbmc-xvba build so that it can be tested widely. Some of this VDPAU and xvba work has been integrated into openelec 2.0 and is a significicant part of its success.
Later we also enabled VAAPI, so that every supported linux hw accel works with this xbmc-xvba ppa.
Away from performance, this ppa does include other stuff. Whole SDL has been dropped and replaced with proper xrandr support, even alt-tab and window manager detection was integrated. We don't recommend to run it on Unity or Kwin, but there are some users, that run xbmc as a desktop player, via alt-tab in windowed mode and are happy with it.
Regards,
Guilhem
Hi and thanks so much. This is a great guide and I followed it to the letter. Would have taken me forever to find all this out!
ReplyDeleteHowever there is just one thing I noticed: after I couldn't get my internal IR to work: ~/.xbmc/userdata/Lircmap.xml seems to have the contents that should be in the lircd.conf. Didn't notice this at first, but then thought that this doesn't look like an xml file. So then I browsed some forums where I found a post by you(!) and there the Lircmap.xml had the right contents... After that, the remote worked like a charm! Shall I post the contents or do you want to correct it in the guide?
Hey many thanks again, wish everybody wrote things down like this, it would save everybody so much work!
Regards Lars
Hi,
DeleteI'm very glad my guide helped you :-) Thanks for you very great comment!
You're definitively right, a stupid error ^^^
It's ok, i've corrected with the good file content.
Regards
Guilhem
This comment has been removed by the author.
ReplyDeleteBonjour est merci pour ce topic. J'utilisais auparavant xvba à l'aide du paquet fglrx et j'ai perdu du jour au lendemain l'accélération; lorsque le décompresseur utilisé était ff-h264-xvba j'obtenais une image toutes les 10s. Donc merci pour la petite mise point sur la nécessité d'utiliser les pilotes fourni par AMD et surtout, les pitites instructions à propos de l'UVD (mais vous avez trouvé cette info où!?)
ReplyDeleteJ'ai eu une petite tuile lors de l'installation: le module fglrx était blacklisté. Je propose de faire vérifier l'installation du pilote avec l'execution de fglrxinfo ou "lsmod | grep fglrx" ou encore "cat /etc/modprobe.d/blacklist* | grep fglrx"
On peut avoir besoin des tutos des autres pour améliorer le sien. Si t'es intéressé par du chiffrement intégral http://doc.ubuntu-fr.org/utilisateurs/lildadou/mediabunker je te préviens que m'inspirerai probablement du tiens :D
Bonjour!
DeleteMerci avec plaisir :-) Oui en effet on peut toujours avoir besoin d'autres tutos pour corriger ou améliorer les siens!
Une bonne partie des info provient du thread XBMC XVBA sur le forum XBMC, et des auteurs eux-mêmes de la version XVBA, le reste de diverses docs, divers tutos et retours d'expérience de ma part.
Noté pour ta remarque, je vais intégrer ça :-)
Ton tuto m'a l'air très intéressant (pas de soucis pour t'inspirer du miens ^^), je travaille pas mal sur les aspects de sécurité et réponse active (fail2ban, ossec, snort), de soluce de cloud privé (owncloud, ajaxplorer) et des aspects de sécurisation des Web services (modsecurity, etc...)
Des articles qui devraient t'intéresser:
Apache avec ModSecurity - Firewall Applicatif Web (WAF - Sécurisation des services WEB)
http://youresuchageek.blogspot.fr/2012/11/howto-apache2-modsecurity-enhance-your.html
Fail2ban (réponse active sur attaque de force brut
http://youresuchageek.blogspot.fr/2012/11/howto-fail2ban-secure-your-network.html
Snort (IDS - intrusion Prevention System)
http://youresuchageek.blogspot.fr/2012/11/howto-guide-to-snort-ids-in-debian.html
Cryptage avec Truecrypt:
http://youresuchageek.blogspot.fr/2012/08/howto-truecrypt-encryption-on-fly.html
Clonage:
http://youresuchageek.blogspot.fr/2012/07/mini-linux-how-to-clone-your-active.html
Et nombre de choses que j'ai implémenté et pour lesquelles je travaille sur des articles:
- nginx en tant que reverse proxy et config la plus secure possible (SSL3, TLS 1.2, etc...)
- analyse de vulnérabilités avancées (nessus, openvas)
- cloud privé (ajaxplorer / owncloud)
- splunk (aggrégateur de logs et frontend pour Snort / modsecurity / Ossec)
- OSSEC (IPS - soft génial pour complètement maitriser ce qu'il se passe sur les systèmes et prévenir différentes tentatives d'accès non autorisés)
Et d'autres choses que je dois oublier :-)
Did you try some kind of VNC solution? I have tried on Lenovo Q180 with ATV graphic card and i can not get it to work. It can be VNC or. any other solution to remotely manage the XBMC. I have build the system around 12.10 minimal ubuntu (without desktop).
ReplyDeleteHi, Yes i've tried and as you say you can't, XBMC can't be remotely acceded by VNC or others.
DeleteBut it depends what you want to manage, you can access to various functions though the XBMC integrated Web server (updating/cleaning the library, playing and managing videos and so on... several front end are available) or through the IOS/Android apps, and for sure you can manage you installation by CLI with SSH :-)
Hi
DeleteI've managed to get Teamviewer working on the Zotac AD10. I know this is not the best solution, you never know what kind of data that company is collecting of you. But if you need it and you are desperate, it works...
Some adjustments are necessary:
In display configuration activate all check boxes.
Don't know how this should work in Ubuntu minimal though...
Regards Lars
Well it can if it is Nvidia based. I have a working vnc with nvidia card.
ReplyDeleteHi Guilhem!
ReplyDeleteAs everyone else has said, superb guide - well done and thank you!
I have used the bits of the guide which I needed, so not all of it was applicable to my setup. Bearing that in mind: A couple of notes from my experiences with it:
I tried this XBMC installation on 12.10 minimal and tried for nearly a week to get my sound working. Same thing on XBMCBuntu. Eventually, I installed 12.10 full and the sound works perfectly, so rather than waste any more time on this crappy Mobo (Sapphire IPC-E350M1W), I used the 12.10 full and cut it back to barebones, which is working quite nicely for now. However, I had a couple of other issues / tweaks that needed to be done:
HOW TO FIX UBUNTU BOOT SPLASH SCREEN AFTER GRUB UPDATES
I could not get the splash to work at boot up and looking around the net, I found this article:
Plymouth, the graphical boot splash screen in Ubuntu stops working after the first install or update of GRUB.
It is all due to a little variable called $vt_handoff in the /boot/grub/grub.cfg file that
blacklists graphic cards and decides wrongly that I am not allowed to see a graphical boot screen.
Simply edit the grub.cfg file and remove all $vt_handoff references in the code.
sudo gedit /etc/grub/grub.cfg
But here is also a short bash script to do the job instead.
Below is the contents of the FixBootSplash.sh file (URL for download at the end, or create your own from content below). You can download the script and use every time
after a update / upgrade.
The file is kept zipped as keeping it in text format on a Win machine screws it up.
Unzip the file with:
sudo tar -xvf fixbootsplash.tar
After saving the file be sure to make the file executable by using
chmod +x FixBootSplash.sh
and execute with
sudo bash FixBootSplash.sh
If you want to reacreate it yourself here is the script contents:
#! /bin/bash
# Fix Ubuntu Plymouth Boot Splash
# if entry exists for $vt_handoff use sed to search and replace
# write to tmp file - move to original
checkVT=$(grep -c "\$vt_handoff" /boot/grub/grub.cfg)
if [ ! "$checkVT" -eq "0" ]
then
echo "> Found vt_handoff removing ..."
sudo sed 's/$vt_handoff//g' /boot/grub/grub.cfg > /tmp/.grub.cfg
sudo mv /boot/grub/grub.cfg /boot/grub/grub.cfg.backup
sudo mv /tmp/.grub.cfg /boot/grub/grub.cfg
fi
echo "> Done"
Download zipped script at:
http://www.thefanclub.co.za/how-to/how-fix-ubuntu-boot-splash-screen-after-grub-updates
MAKE MACHINE POWER OFF DIRECTLY WITH POWER BUTTON
Edit existing /etc/acpi/events/powerbtn file
1.- sudo gedit /etc/acpi/events/powerbtn
2.- Add # to comment line: #action=/etc/acpi/powerbtn.sh
3.- Add a new line: action=/sbin/poweroff
4.- Save file
5.- Open a console and type: sudo acpid restart
I take no credit for any of this - it's all from forums and its all other peoples work. But perhaps this will come in handy to someone else reading this!
Hi Nick,
DeleteThanks a lot and happy new year :-) I'll check all that and will make required modifications, again thank you for sharing your improvement ^^
Hi Nick,
DeleteThanks again, your comments have been included :-)
Cheers.
I´m trying to build a nice HTPC with Xubuntu (12.10 x64) and XBMC.
ReplyDeleteThe specs for the PC are here:
http://www.zotac.com/de/produkte/product/amd/category/zbox/main-category/mini-pcs/detail/zbox-ad06-1/section/specifications.html.
Mainly I followed your guide. But everrytime when I instrall the AMD drivers (auto or manual) I get only the Linux login in and XFCE isn´t working anymore.
I already updated the Kernel to 3.7.1. but now I´m struggeling (again) with the AMD drivers. Any Ideas how to install them (Or at least get a decend working grafik enviroment)?
Thanks for your help.
Hi,
DeleteWell you should not have any issue with AMD driver installation under Xubuntu 12.10.
My guess, you have a problem with your Xorg configuration, ensure to :
- Install Catalyst driver (i recommend manually)
- Stop Xorg in command line (sudo service lightdm stop), in preference through a remote computer using SSH
- Proceed to amdconfig statements as described above ("sudo aticonfig --initial -f" and so on)
- Restart Xorg
If Xorg can't start, then you must some error in /var/log/Xorg*.log, take a look in logs
- Which version of Catalyst driver are you trying to install ?
- Why upgrading to kernel 3.7.1 ? You should keep the 12.10 default kernel before trying anything else
Perhaps you could try older version of Catalyst driver i you have any issue, try 12.8
Hi there,
Deletefritsch was so kind to help me with my problem, it figured out that one of the problems was that I had UEFI enabled. Before I had a clean install only with basic Xubuntu and the AMD driver via (sudo apt-get install fglrx). Maybe it helps for somebody else.
Guilhem
ReplyDeleteThanks for a fantastic blog. I have been reading it the last several days and have really learned a lot. I plan to build a HTPC and was wanted your opinion. Would you recommend the OpenELEC install over the above Ubuntu install? It looks like OpenELEC is easier but the Ubuntu install allows you to tune the ATI video drivers. Also, do you see much difference in the Zotac models for example AD12 vs AD04 especially from a graphics performance? They seem very similar.
Thanks again!
John
Hi John,
DeleteThanks a lot i appreciate :-)
to answer your questions:
- OpenELEC Vs Ubuntu
In my opinion, this is not exactly the same purpose, if you plan to use it ONLY as a Media Center then OpenELEC is a very great solution, easy to install, easy to maintain, starts in few seconds and so on.
On the opposite, Installing XBMC under Ubuntu requires time and tuning but also offers much more possibilities and tuning. (still tuning the ATI driver is generally not required with OE)
In deed, if you plan to use your media center as a central home server, you will quickly reach limitations with OE , which is not really made for that... (sharing your library with Mysql, torrent/usenet downloads and much more, will be more difficult or impossible with OE depending what you want to do)
As a conclusion, for an end user that doesn't want to spend time in hard tuning, OpenELEC is a very great solution that works fine out of the box ^^
- Differences between models:
You won't feel any graphic difference between these models, HD video playing is running with hardware acceleration and will be identical with any recent model (as far with AD02/04, AD10/11/12)
But there is others differences with these models, the AD04 which is bigger than a Nano is also quieter (even if Nano noises will easily be covered by film sounds).
And also the AD12 has an integrated IR built in which the AD04 has not (it's provided with an external USB IR receiver)
The advantage of an internal IR is that you can use the provided remote control to start up the zotac, which is not possible with an external)
So again if you plan to use it only as a media center, you probably won't let always it up (on the opposite with one acting as an home server) and using the remote to start up/shutdown is much more pleasant than pressing a button on the box ^^
Hope it helped
Guilhem
Guilhem
ReplyDeleteThanks for your thoughtful insights.
Are you running your Zotac machine at 1920 x 1080 resolution? If so, any issues or recommendations? I plan to output to a 50" plasma. What screen resolution are running on your Raspberry Pi project?
Thanks again!
John
Hi!
DeleteThanks ^^ Yes, i've tested different Zotac with different TV in 1920x1080 (with big TV plasma and led), no problem :-)
In general some little things to set, inside XBMC configuration naturally you set the resolution, and set the screen to fit your Tv (Video Calibration)
One important thing, i've seen with some Tv the resolution changing when playing back video (even if set before in XBMC), and sometime the screen does not fit borders of your TV (you can see it with icons closed to TV borders), in this case:
- launch a video and put to pause
- select video config and Video Calibration, redo the calibration and select to apply to all video
That's no big deal but still hard to find the first time!
About the Raspberry no real issue with the resolution, just follow my guide and test some configuration, sometimes setting border in hard config works great, sometimes less and you have to play with XBMC but no problem through ^^
Guilhem
Can you tell me what the difference is between xbmc-xvba and frodo rc3? I pretty much followed your instructions but used the ppa:team-xbmc/unstable to get frodo rc3. I also have an older ati graphics card so I followed your memorandum to install the older drivers. I don't know if it was a combo of using your driver instructions and using frodo rc3 but xbmc wouldn't start up, something to do with driver issues. So I followed this post https://launchpad.net/~makson96/+archive/fglrx to install legacy drivers and now xmbc frodo rc3 starts right up. I guess I really want to know what the differences are if any and if I should go with xbmc-xvba? Btw, thanks for the great write up. It's easy to follow and work through.
ReplyDeleteDid some more work on my system and ended up installing xbmc-xvba. Realized because I was using 12.10 lubuntu that your older ati graphic instructions wouldn't work no matter what. If you follow that launchpad link and follow those instructions, then xbmc will work on 12.10.
DeleteHi Pip,
Deletethanks for your comments, what's your ATI graphic ?
I well understood running the automatic proprietary driver installator solved your issue ?
My graphics is ATI Radeon HD4290 GPU. Like I said to get the graphics card working in xbmc and lubuntu 12.10 I added the repository ppa:makson96/fglrx and then installed fglrx-legacy.
DeleteI have since gone down to Lubuntu 12.04. To get the graphics working there, I just used the gui to automatically install the driver from "start menu-preferences-additional drivers" That also works just fine.
I should also note that when I installed xbmc, it had no pvr support or options to install a pvr add on. I had to go to http://www.dotnetdevelopers.net/XBMC/xbmcpvr.htm to install the tvheadend pvr add-on.
Hello,
ReplyDeletethanks for this great manual! It's really complete! I have followed it to setup my Zotac AD02. But I have a periodical problem with the HDMI output. When I'm watching a film I get periodically a green screen (all the screen gets green). If a switch between CTRL-ALT-1 and CTRL-ALT-7 I can recover the video again. But it happens periodically again...
My setup is based on XUbuntu 12.04 TLS, Catalyst 12.10 and XBMC Eden-XVBA.
Could you give any adive?? Thanks in advance :-),
Christian
Hi Christian, Thanks a lot i appreciate :-)
DeleteAbout your green screen issue when playing back, i would think about your UMA frame size in UEFI set too small.
See this post, step 1:
http://youresuchageek.blogspot.fr/2012/09/howto-openelec-get-perfect-fusion-xbmc.html
Last Zotac comes with au updated UEFI version that introduced a frame buffer size option, by default the size is too small, set at least at 512MB.
If this is not your issue, then double check:
- Your settings in XBMC (playback and video parameter like , recheck my guide)
In System->Settings->System->Video Settings:
Vertical Sync: Always on
In System ->Video->Playback:
XVBA: On
Adjust Refreshrate to match video: On
Sync Playback to Display: On
Sync Method: Video Clock (Drop/Dupe)
- As you use Xubuntu, ensure to deactivate compiz (it's in the guide)
- double check your xorg configuration for ati, ensure to do aticonfig whith xorg stopped (sudo /etc/init.d/lightdm stop)
- double check your ati driver is ok and loaded (dmesg | grep fglrx)
But first check UMA frame buffer size, good chance for it!
Let me know
Cheers
Hello,
DeleteI tell you more. Regarding your suggestions:
- I already had configured the 1GB UMA Frame size as you suggested
- My video settings are the following one:
In System->System->Video Output:
* Vertical blank sync: Always enabled
In System->Video->Playback:
* Render method autodetect
* VDPAU enabled
* VAAPI enabled
* XVBA enabled
* Adjust display refresh rate to match video always
* Pause during refresh rate change
* Sync playback to display enabled
* A/V syn method Video clock (Drop/Dupe audio)
* Allowed error in aspect ratio to minimize black bars None
* Display 4:3 videos as normal
- I disabled composition as you suggested.
- I ran aticonfig with litgthdm stopped.
- Output of dmesg | grep fglrx:
zako@htpc:~$ dmesg | grep fglrx
[ 3.051048] fglrx: module license 'Proprietary. (C) 2002 - ATI Technologies, Starnberg, GERMANY' taints kernel.
[ 3.404667] [fglrx] Maximum main memory to use for locked dma buffers: 892 MBytes.
[ 3.404874] [fglrx] vendor: 1002 device: 9802 count: 1
[ 3.405575] [fglrx] ioport: bar 1, base 0xf000, size: 0x100
[ 3.406171] [fglrx] Kernel PAT support is enabled
[ 3.406220] [fglrx] module loaded - fglrx 9.0.2 [Sep 28 2012] with 1 minors
[ 6.375924] fglrx_pci 0000:00:01.0: irq 45 for MSI/MSI-X
[ 6.377159] [fglrx] Firegl kernel thread PID: 1214
[ 6.377571] [fglrx] Firegl kernel thread PID: 1215
[ 6.377970] [fglrx] Firegl kernel thread PID: 1216
[ 6.378163] [fglrx] IRQ 45 Enabled
[ 6.389066] [fglrx] Gart USWC size:304 M.
[ 6.389070] [fglrx] Gart cacheable size:117 M.
[ 6.389080] [fglrx] Reserved FB block: Shared offset:0, size:1000000
[ 6.389084] [fglrx] Reserved FB block: Unshared offset:ff0a000, size:f6000
[ 6.389088] [fglrx] Reserved FB block: Unshared offset:3fff4000, size:c000
I have been doing more tests:
* I have the problem also when I'm logged to the XFCE Desktop. Suddenly the screen gets green and sometimes it's corrected automatically and other times I have to switch between a console and the X session to recover normal video.
* Previously to XUbuntu I installed Ubuntu (Ubuntu+XBMC) and I also suffered the same problem: The green screen in the desktop and in XBMC.
* I don't think that it's a problem related to the TV. Previously I had an ION mini-PC and I hadn't that problem.
I don't know what more to test: perhaps something in the BIOS? configuration of admcccle? .... Will I have to run XBMC on Windows? :-(
Thanks for your suggestions!
Christian
It seems to be a common problem in some ZOTAC devices running Linux instead of Windows. Searching in google "zotac green screen hdmi": http://openelec.tv/forum/67-display/30841-video-playback-issues-on-zotac-ad10-amd-e-350
DeleteI will have to continue searching....
Well that's quite strange, therefore about XBMC settings you should only let activated XVBA under XBMC settings:
Delete* VDPAU enabled
* VAAPI enabled
Still if you also this issue under XFCE, you problem is not XBMC related.
Perhaps should you also try different resolution / frequency settings, and try another Catalyst version like 12.9 Quantal Beta.
I've tested several zotac devices, i only had this issue under OpenELEC with UMA frame buffer size unset...
Also, you should perhaps try another HDMI cable in case of :-)
I was in the tread you mentioned, the guy finally resolved its issue by totally re installing its system...
Let me know the result of your search
I continued doing some test. I reinstalled XUbuntu without success and I finally installed Windows and I getting the same error so it may be something related with the BIOS, TV, hardware problem, ...
DeleteNow I'm using the DVI output connected to the VGA input of my TV using a conversor and I'm going to test also other HDMI ports the TV has.
It's not being an easy setup.... xD
In deed it's not ^^
DeleteWell if it's TV related you probably would have the same issue with any other HDMI device (if you have some)
Do you have last bios version ? reset bios to default values ? tested with an other hdmi cable or input hdmi port ?
Good luck!
I finally found the problem! I tell you because it may be interesting for other people with the same problem. It seems to be a problem between ati graphic drivers and philips TV and can be solved selecting the RGB4:4:4 pixel format instead of the YCbCr444 that it's the default.
DeleteIt worked for me in Windows and I suppose in Linux it should work also.
Thanks for your help!!
Christian
Great :-) Not to easy to find!
DeleteEnjoy your victory ^^
Thank you so much for your effort, this post is brilliant and so helpful.. Please keep maintaining it. Very well done, thank you!
ReplyDeleteThanks a lot ! I will try to :-)
DeleteCheers!
I have gotten networking to work however i can only get 65Mb/s which is not enough to stream 1080p anyone else having this issue? This card should be good for 300MB/s right?
ReplyDeleteiwconfig
lo no wireless extensions.
ra0 Ralink STA ESSID:"ComputerKing24" Nickname:"RT3290STA"
Mode:Managed Frequency=2.437 GHz Access Point: 58:6D:8F:1C:AA:CF
Bit Rate=65 Mb/s
RTS thr:off Fragment thr:off
Encryption key:FAE3-2CF3-9874-2D74-AA66-A3CC-584C-DCF1 Security mode:open
Link Quality=85/100 Signal level:-52 dBm Noise level:-81 dBm
Rx invalid nwid:0 Rx invalid crypt:0 Rx invalid frag:0
Tx excessive retries:0 Invalid misc:0 Missed beacon:0
eth0 no wireless extensions.
Hi,
DeleteIntegrated wireless interfaces are in my opinion not very powerful, i never got good performances with it, if you were planing to stream HD videos from your Zotac using Wireless this is perhaps not the better option i think...
Still you can look for alternative driver (i think there are 2 alternatives), but as far as i've tested performances were quite the same and enough poor.
Guilhem
Hi Guilhem,
ReplyDeleteAs has already been said many times, great work and thanks for making available for us all to follow and learn from.
My system is currently running on Ubuntu 10.04 and has been working reasonably well but I'm getting short of space on the 16GB memory stick and so about to upgrade to a 32GB stick. Fortunately I've found you're guide and intend to try enabling xvba on my graphics card. But first I'd like to check that my system meets the requirements as most of the posts here relate to Zotac and AsRock type systems.
I have a HP MicroServer N40L which comes with an AMD Turion II Neo N40L / 1.5 GHz CPU and I've installed an AMD Sapphire Radeon HD6450 graphics card. So I think that the hardware is suitable for me to use you're guide?
BUT, I'm also running a RAID 5 array of drives where all my films and photo's/documents are stored. This is a software RAID setup with Ubuntu (the N40L only supports hardware RAID levels 0 and 1). I've seen from previous posts that I can still use SAMBA with your choice of installed software, but will I still be able to use my RAID array and are there any special considerations I need to take?
I also like to use DigiKam for my photos but if installing Xubuntu I'm guessing this will still install as normal?
I'm completely new to Linux and have already learnt a great deal with my existing setup, sorry if these are simple questions to you but I've not come across that answer in the above posts.
Kind regards,
Alan
Hi Alan,
DeleteThanks you very much :-)
I'll try answering to your questions:
1. About your system requirements, i think yes, you should be able to use XBMC with XVBA to use Hardware acceleration using your ATI graphic card, since the HD6450 shall be compatible including latest Catalyst driver
2. Using Software Raid doesn't change anything to your configuration, this is considered by the system as any normal file system as this is a low level abstraction layer.
So no problem with samba or NFS to your share media Library.
3. Any Software available for Ubuntu will also be for Xubuntu, Lubuntu or any derivated distribution, the OS core and software repositories are the same, only installed packages and desktop will vary. (plus some settings)
I would advise you to take very much care to backup your system and data before beginning any OS upgrade, moreover as you are using Software Raid which can be source of some complications. (even if Ubuntu shall detect it and leave untouched unless you ask the contrary)
Take a look at this post:
http://youresuchageek.blogspot.fr/2012/07/mini-linux-how-to-clone-your-active.html
Using Partclone (or such solution) to backup and restore a full Linux OS (or data but the real OS is the real interest with this) is very easy (you can do it by booting Ubuntu as live OS and installing partclone)
That way you would still be able to easily restore to your previous OS in case of trouble.
Finally, your Raid filesystem is probably running ext3 (which is fine anyway), you could consider converting it to ext4 to take benefit of last ext4 improvements.
Good luck and let me know if you have any issue ^^
@Guilhem,
DeleteI took a chance and have installed Xubuntu over the weekend following sections from you're guide. I can confirm that the hardware of the N40L and my Radeon HD6450 graphics card are fully compatible. I now have hardware accelerated graphics and the improvement in performance is noticeable from what I've seen so far.
Once this was setup and working I then connected the RAID array which just needed mdadm to be installed, followed by the usual trouble getting it to automatically mount correctly on md0, and because it's a new operating system all the file ownerships were wrong and so I've had to correct these too.
I'll definitely be looking at you're post related to cloning my system. This is of great interest to me, but will have to be a project for another day ;-)
As for my RAID array, I'm already on ext4 as my system is not that old ( its about to celebrate its first birthday).
Being a complete Linux Noob it's nice to find a place on the web that has information being kept up-to date. There's so much old and incorrect info out there that it's difficult for someone like me to get started with Linux (especially when things don't work quite as expected).
Please keep up the excellent work, I'm sure that many more people will have benefitted from you’re advice than have posted here.
The only improvement I could suggest would be that you stick to a standard date format for you're revision history at the very top of this page. It was slightly confusing as some dates appear to be dd/mm/yyyy and others are mm/dd/yyyy and this is the first item a visitor see's on entering you're excellent guide.
Sincerely,
Alan
Hi Alan,
DeleteI hope you're fine and enjoying your all new installation, nice to hear you successfully migrated with no major issue ^^
You are definitively right about the date format, i sometimes have some trouble or confusion between English and French style :-)
I will correct this!
Cheers,
Guilhem
Hi, thanks for the guide it helped to save some time to rebuild my XMBC after a HDD crash, some comments which might help others to save some time.
ReplyDelete- XBMC 12.0 Frodo is final
Thus I suggest the Frodo repository, since xbmc-xvba repository will install ALPHA and Eden is not that current anymore.
sudo add-apt-repository ppa:wsnipex/xbmc-xvba-frodo
- Audio issues with mkv ac3 with HDMI connected TV
I had to set Audio Output to Analog, while the Audio Device Output and Audio Passthrough output device to HDMI, when setting Audi Output to HDMI, otherwise just crackling (knattern) on a PC display, no sound on my TV. GUI sound, mp3, SD in mpeg and xvid where working fine.
This issue took me some time.....
-CPU usage much higher with AEON NOX skin
With Confluence skin my CPU usage when idle is 6%, when using AEON NOX 4 it is between 30% and 60%. I use the recommended advancessetting.xml and RSS Feed is disbaled in both.I think a part of this CPU is caused by the background changes in,but animations are disabled in settings, I stay on Confluence and might try to reduce the CPU usage at AOEN NOX at some point, or has someone some suggestions how to reduce it
cu atze
Hi there!
ReplyDeleteNice guide, just want to point out a typo, in the part tune your system it says defaut in the grub line instead of default.
Hi, Many thanks for correcting :-)
DeleteHi
ReplyDeleteGreat guide. Easy to read and follow.
I've had an ongoing problem with shutting down my HTPC. I have a Zotac zbox id80 running xbmcbuntu.
Whenever I choose shutdown directly from xbmc the big xbmc logo comes up with the 4 dots beneath it. Eventually the light on the HTPC turns to red (from green) but the screen still displays the xbmc logo with the dots frozen!
Any ideas or suggestions would be greatly appreciated.
Hi, thanks ^^
DeleteWell quite strange, does your HTPC shutdowns correctly through the command line ? (connected with ssh, using the command "sudo init 0" or "sudo shutdown now"
You should check the default option for shutdown action in XBMC, and also double check the section Step 8, perhaps something to do with it...
Also, i would advice you to check if you have the last Zotac bios version, upgrade if necessary and reset bios options to default (in case you changed something related to power management)
Let me know!
Hey
DeleteIt does shutdown with command line. It's odd sometimes it shuts down properly.
This may be a stupid question but how do you update the bios? As you can tell, I'm a newbie ��
Hi,
ReplyDeleteGreat guide !! A lot of useful information.
I just ordered the ZOTAC ZBOX AD03, but I'm still wondering if I have to go for Ubuntu + XBMC or XBMCbuntu. What's the main reason you choose to go for XBMC + Ubuntu ? Are there some huge advantages ?
I tophe,
DeleteThanks ^^
Well not really, both can be good solutions, i personally prefer to start from a clean standard distribution to control whatever i want, but it's up to you.
Starting from Ubuntu minimal as for an example let you install step by step what you want and configure what you need.
In the other hand, starting from XBMCbuntu could help you to save time in configuration if you're not really interested in it.
Moreover, if you start from XBMCbuntu, don't forget to uninstall XBMC at the very beginning to install XBMC XVBA (which i recommend)
Therefore, if you are interested by an "out of the box" solution, i would recommend OpenELEC which is very cool and works very fine quasi without having to deal with any manual configuration. (but there is more limitations than using a full OS like Ubuntu or any else)
http://youresuchageek.blogspot.fr/2012/09/howto-openelec-get-perfect-fusion-xbmc.html
As a conclusion, when you speak about Ubuntu, keep in mind that we are only speaking about Ubuntu Minimal (which comes without any desktop) or specific lightweight Ubuntu derivated (like Lubuntu or Xubuntu)
Unity, the Ubuntu desktop, is not really light and will generates trouble with Catalyst driver, don't use it
Cheers
Hi Guilhem,
DeleteThanks for taking time to answer my comment.
In fact on my other system I already use OpenElec ! And I really love it : Flawless, Fast, ... but I miss one thing on it, it's a webbrowser :(
That's the reason why I was looking at this guide.
Cheers
Hi Tophe,
DeleteI know someone wrote an addon for OpenELEC using Opera Browser, i tested it a few and seemed to work good enough (even if don't really would choose Opera as my main browser)
If you're interested, see:
http://dl.dropbox.com/u/8224157/OpenELEC-Ultra/opera/final/index.html
Anyway, using a full OS like Ubuntu is a good solution in my opinion, and you're free to choose whatever you want ^^
Cheers!
This guide solved a problem that I've been having with FPS drops on my Lenovo Q180 Xbmcbuntu install. This a a fantastic guide and I will be using it the next time I do a rebuild.
ReplyDeleteThank you very much :-)
Hi, i'm very glad to hear it thanks! ^^
DeleteAWESOME, this made my gigabyte-e350-usb3 mother play 1080 blu ray flawless.
ReplyDeleteTHANK YOU!
Thanks, my pleasure :-)
DeleteHi,
ReplyDeleteI followed your guide twice. I don't know why I'm getting a tearing video ( on any video I watch stored locally).
Can you give me some input?
I have minimal ubuntu from http://archive.ubuntu.com/ubuntu/dists/precise/main/installer-amd64/current/images/netboot/mini.iso
I have Zotac AD04 and followed the "Official Release: ATI Catalyst Version 12.10 (Release Version):" guide.
Hi,
DeleteSorry for late answer.
This could be related to the UMA Frame Buffer size introduced in last UEFI Zotac versions, have you changed it ?
Check you set the UMA Frame Buffer Size to the upper value possible, should be 1GB.
(this is said in introducing message a the begining of the post, with more details here:
http://youresuchageek.blogspot.fr/2012/09/howto-openelec-get-perfect-fusion-xbmc.html
See the section "Step 1: Configure UMA frame buffer size in UEFI")
If you're ok with the UMA frame buffer size, you need to verify you ATI installation.
In a terminal, enter the command:
"fglrxinfo"
It should return various information about your card and ATI driver.
Also, you can use "fgl_glxgears" which is a graphical 3D test of your ATI driver"
Let me know!
Hi, No problem with late reply. It gave me more time to play around some settings. In ATI catalyst I enabled No tearing and it works good. Thanks :)
DeleteThis comment has been removed by the author.
ReplyDeleteHi im newbie at this but :D I have installed Lubuntu and ATI drivers thru the auto commando and configured the aticonfig. Installed xbmc frodo but i dont have the XVBA button in options. Also how do i configure the system files to optimize my system? sudo edit dosent work :P I dont think i have sound either.. want it both in Lubuntu and xbmc.
ReplyDeleteHi,
DeleteWelcome :-)
a) XVBA option:
The XVBA option should be available inside XBMC in Video configuration, if you don't have it then maybe you don't have the good version installed.
Was XBMC installed before adding the ppa ? have you updated apt before installing ?
To find you installed version:
sudo dpkg -l | grep xbmc
You package should contain a comment about "Xvba Edition", if not:
I would advice to purge and reinstall, as follows:
sudo apt-get autoremove --purge xbmc xbmc-bin
--> Will uninstall XBMC and associated packages
Check the ppa is installed (you should see a file called *xvba* in "/etc/apt/sources.list.d/")
sudo apt-get update
sudo apt-get install xbmc xbmc-bin
recheck your installed version using dpkg -l
b) "sudo edit"
sudo edit means editing a file as root using your prefered text editor, mainly in terminal mode which the quicker and easier way to do (you just have to know some little tips)
Most of people will use vi, inside a modern Linux and for you, i would recommend using vim (sudo apt-get install vim)
When you edit a file in terminal (sudo vi myfile), save your modification by typing ":wq!"
using normal vi, you first have to go into insert mode by typing "i", then do your modification and save.
Alternatively, you may try nano wich i a good editor too (sudo apt-get install nano)
Then inside nano, shortcut to edit are shown at bottom of the window
c) file system optimization
Mainly optimizing your file system is quickly done, most important are:
1. deactivating atime:
edit /etc/fstab, look for the line containing your root partition (/) and add "noatime"
2. If you have an SSD, you should activate trim adding "discard"
You line will contain "errors=remount-ro,noatime,discard"
other tips like tmpfs and swapiness can also be tried. (but tmpfs may sometimes generate bad things, mostly with suspend function)
d) sound:
By default, Lubuntu uses pulseaudio, to get the sound working in Lubuntu, check in system / configuration and set your output device
In XBMC, you have to set it, follow the guide and it should work.
in rare cases, Pulseaudio can generate some issue between LXDE and XBMC, but first try and you will see if this works...
Let me know
Thx alot :) I got black borders so i used that commando but now xmbc is the other way around :P i can only se halv the buttons and half the clock, i use 1920x1080 and have used 1920x1080 in xbmc on this tv before. I have sound in xbmc now but not in LXDE, i dont think i have sound settings :D when i try to start pulseaudio in terminal it want me to install it. Also i cant find that Advanced Launcher in XBMC.
DeleteYep ^^
Deletea) That's easy, you just need to calibrate your screen, in 2 steps:
1. Go in XBMC Setting / System / Video ouput
You'll find the video calibration interface, then you simply calibrate your screen.
I also advice you to do the same while playing back, sometimes this is required, sometimes not.
Open any movie, then make it pause.
In the playback menu, you have an icon for video settings,go into it and you'll find an other sreen calibrate interface.
Re-do the same and check, at the final you should have both XBMC and playback calibrated to screen.
b) Sound configuration:
2 options for you:
1. .asoundrc file in your home directory
Create an asoundrc (vi ~/.asoundrc) depending on your config (HDMI / SPIDF output), check the section "Step 7: Configure Audio / OLD WAY" to choose your config file
Relaunch your LXDE session and check if sound is working or not
2. LXDE normaly uses pulseaudio as the sound system, you can check if this is installed (sudo dpkg -l | grep pulseaudio)
I haven't tested it since a while, therefore, as far is remember you have a sound config section, check in sound & video menu
this looks like:
http://www.google.fr/imgres?um=1&client=ubuntu&sa=N&channel=cs&hl=fr&biw=1366&bih=581&tbm=isch&tbnid=0fPeCk_5akIrQM:&imgrefurl=http://askubuntu.com/questions/196606/system-starts-without-sound-in-lubuntu&docid=OVq4kgUKDxaK1M&imgurl=http://i.stack.imgur.com/sBIlj.png&w=807&h=432&ei=DxuEUdWHEoPBtQaq_4HwDQ&zoom=1&iact=hc&vpx=875&vpy=67&dur=1822&hovh=164&hovw=307&tx=208&ty=98&page=2&tbnh=133&tbnw=249&start=19&ndsp=26&ved=1t:429,r:36,s:0,i:196
You simply need to set the good ouput device.
If pulseaudio is not installed, then in need you probably need to install it
c) advanced launcher
There may be other way to proceed now (haven't recently checked), any way i need to update this section.
- Download this repo zip file and install it manually (go in parameters / extensions / install using zip
Deletehttp://www.gwenael.org/Repository/repository.angelscry.xbmc-plugins/repository.angelscry.xbmc-plugins-1.2.2.zip
- Then install the addon (if already installed it shall be update automatically)
Then, to configure your entry you can do it using the advanced launcher interface (which is not always very easy) or manually.
See the relevant section inside my guide
Sry for being bad at this :( i dont have that sound settings, when i go to sound settings i get alsamixer... installed pulseadio and when i try to run it i says Daemon is already running and i cant start it. Also calibrate the screen aint working :( i need to calibrate it up and dawn also but i can only do it sideways. Trying to create the asoundr file but i cant do it the explorer how do i do it in the terminal.
DeleteFigured out how to calibrate :) also created that asoundr file in /home and /home/xbmc and and put in the config for hdmi u pasted but i got a AD02, but aint working. hmm i think i created the file with sudo vi does that matter?
DeleteNow i got the advanced launcher to work :) but no sound there either. the only thing i think i need to do is to set the system so it knows it HDMI but i dont know how :D
DeleteThe file for alsa manual config must be located inside your user home directory, if you have called your user "xbmc", then the file name will be (take care of the "point" at the begining of the filename)
ReplyDelete/home/xbmc/.asoundrc
the deal will this is to create a pcm ebtry corresponding to your hardware, and the default system pcm associated to it.
You should also ensure using the command "alsamixer" that your HDMI output isn't set to mute.
Check what you have in the application menu containing "sound", look for some "mixer"
I suggest you to read this page:
http://askubuntu.com/questions/80384/where-are-the-lxde-sound-preferences
Thanks a million for the post. For your information, I had to use the following commands to successfully install the WiFi drivers:
ReplyDeletewget http://downloads.zotac.com/mediadrivers/mb/download/NB087_WiFi_V2600_20120508.tar.gz
tar -zxvf NB*.tar.gz
cd DPOLinuxSTA_V2600_
sudo make
sudo make install
cd os/linux
sudo insmod rt3290sta.ko
sudo reboot
Note the cd DPOLinuxSTA_V2600_ and the sudo before insmod rt3290sta.ko
Hi Pierre,
DeleteThanks, i'm glad if it helped you.
I will report the way you did to install wireless drivers, what's exactly your device model ?
It feels so nice to find somebody with some original thoughts on this subject. Really thankful to you for starting this.
ReplyDeleteatv performance parts
I'm glad you like, thaks :-)
DeleteBonjour, et merci pour ce tuto, qui ma permis de regler au petits oignons ma configuration.
ReplyDeleteIl reste un soucis, je laisse xbmc 24/24, car il tourne sur mon serveur (un HP N40L+ATI 6450) mais lorsque je ralume la tele, j'ai la barre de tache XFCE qui et par dessus xbmc ...du coup ma seul solution c'est de fermer xbmc puis de le relancer, mais c'est pas trop pratique.
Qqu'un a ce soucis ?
Merci encore !
Bonjour,
DeleteAvec plaisir, heureux que cela t'ai été utile ^^
Ton XBMC doit passer en mode fenêtré, vérifie dans la config: System / Video Output / Display mode
Hi,
ReplyDeleteshort correction as I see a whole lot of users coming to the xbmc forums, that have problems that are sometimes related to dirty regsion. Could you please sync your advancedsettings.xml to the one, we have in our original howto? E.g. set it to 3 or leave the three options just out (DR, timeout, visualize). DirtyRegion 1 is in general not that safe.
And thanks again for writing that detailled and well written howto.
Hi Peter,
DeleteThanks for your correction,i've just updated the Howto ^^
If you see other things, don't hesitate to tell me, i try to keep it updated as much as possible :-)
Cheers!
Hi there!
ReplyDeleteI'm using Ubuntu 13.04 (minimal setup) and did everything from start to finish (only the remote part using an external USB receiver (Philips)), but that didn't work out very well.
I was able to install everything as described, even the compiling part. I verified that "lircd" is running - and it is, but "irw" does not display anything when hitting the buttons (on the remote), so naturally, XBMC is not accepting anything, as well. :-(
I re-tried the setup.sh step several times, also worked on the X11 config, but that's looking good. At least nothing changed there. So I'm stuck now, I guess...
Do you need something special (log file etc.) to take a look into my setup? :)
Thank you!
Hi,
ReplyDeleteThanks you for that guide! I followed it and everything works for me on AsRock E350M1/USB3, Lubuntu 12.10
I have the following remarks:
1) The instructions for the splash screen were not necessary for me. I just did
wget http://excyle.nl/plymouth-theme-xbmc-logo.deb
sudo dpkg -i plymouth-theme-xbmc-logo.deb
and I got the xbmc splash screen.
2) HDMI sound worked out of the box for me.
3) On my LG37'' tv, vertical refresh rate of 60 results in white "snow" dots on the xbmc GUI.
Switching the refresh rate to 30 resolves the problem (even though the documented refresh rate for my tv is 50-75). The problem does not occur when I am connected through a receiver.
4) By default, usb disks were not automounted for me in xbmc standalone mode. I fixed that
by following the guide in http://wiki.xbmc.org/index.php?title=HOW-TO:Install_XBMC_on_Ubuntu/HOW-TO_3, section "USB Automount"
Thanks!
I invite you to the page where see how much we have in common. https://igraphicbox.co.nz
ReplyDeleteGone are the days when it used to be called XBMC. Nowadays, it is called as Kodi. Here is the complete guide on how to install the Kodi. https://www.vpnhacks.com/how-to-install-kodi-on-firestick.html
ReplyDeleteone more thing, I forgot to mention that procedure to install the kodi on firestick is really easy. just give it a try.
ReplyDeletegoogle 345
ReplyDeletegoogle 346
google 347
google 348
google 349
google 350
google 351
Thank you so much for sharing this blog! keep it up... This article will tell you the best way to Jailbreak Firestick.
ReplyDeleteBy doing this, you will approach a huge number of free motion pictures, TV shows, sports, live channels, and that's only the tip of the iceberg.
A similar interaction will likewise work for the Fire TV, Fire TV Cube, and TVs running the Fire TV OS.
Youresuchageek: Xbmc Install And Config Howto For Linux On Amd Graphic Based Systems (Fusion) - Xbmc Xvba >>>>> Download Now
ReplyDelete>>>>> Download Full
Youresuchageek: Xbmc Install And Config Howto For Linux On Amd Graphic Based Systems (Fusion) - Xbmc Xvba >>>>> Download LINK
>>>>> Download Now
Youresuchageek: Xbmc Install And Config Howto For Linux On Amd Graphic Based Systems (Fusion) - Xbmc Xvba >>>>> Download Full
>>>>> Download LINK
I would like to add something that James has talked about. Using a VPN is optional for those who do not love to protect their privacy. Many Kodi Builds f are really not safe and may steal the private information.
ReplyDeleteCloudways is a managed cloud hosting platform that offers users the ability to deploy and manage their web applications on cloud infrastructure from various providers such as Amazon Web Services (AWS), Google Cloud Platform (GCP), DigitalOcean, Vultr, Linode, and others. The platform provides an intuitive interface that simplifies the process of managing server infrastructure and automates tasks like server deployment, security updates, and backups. https://s3.amazonaws.com/cloudways-promo-code/index.html
ReplyDeleteMalatya
ReplyDeleteKırıkkale
Aksaray
Bitlis
Manisa
NH60PF
denizli evden eve nakliyat
ReplyDeletekars evden eve nakliyat
çorum evden eve nakliyat
kars evden eve nakliyat
malatya evden eve nakliyat
8ECİ
11FF0
ReplyDeleteSincan Boya Ustası
Batman Evden Eve Nakliyat
Silivri Çatı Ustası
Yenimahalle Fayans Ustası
Pursaklar Boya Ustası
Adana Lojistik
Bursa Şehirler Arası Nakliyat
Mercatox Güvenilir mi
Çanakkale Şehir İçi Nakliyat
1C551
ReplyDeleteÇerkezköy Parke Ustası
Muğla Şehir İçi Nakliyat
Karabük Lojistik
Kırklareli Şehirler Arası Nakliyat
Tokat Şehir İçi Nakliyat
Silivri Çatı Ustası
Probit Güvenilir mi
Zonguldak Şehir İçi Nakliyat
Niğde Şehirler Arası Nakliyat
AF947
ReplyDeleteÇerkezköy Yol Yardım
Çerkezköy Koltuk Kaplama
Batıkent Boya Ustası
Osmaniye Şehirler Arası Nakliyat
Rize Evden Eve Nakliyat
Kayseri Şehir İçi Nakliyat
Uşak Şehirler Arası Nakliyat
Isparta Şehirler Arası Nakliyat
Rize Lojistik
4FCA3
ReplyDeleteBatıkent Boya Ustası
Tokat Parça Eşya Taşıma
Niğde Parça Eşya Taşıma
Tunceli Lojistik
Kilis Evden Eve Nakliyat
Ordu Parça Eşya Taşıma
Muğla Şehir İçi Nakliyat
Malatya Lojistik
Çerkezköy Evden Eve Nakliyat
2B7B5
ReplyDeleteOrdu Şehirler Arası Nakliyat
Elazığ Şehir İçi Nakliyat
Muş Parça Eşya Taşıma
Mardin Parça Eşya Taşıma
Yalova Şehirler Arası Nakliyat
Çanakkale Evden Eve Nakliyat
Batıkent Parke Ustası
Çerkezköy Cam Balkon
Rize Lojistik
D1AD8
ReplyDeletesakarya en iyi sesli sohbet uygulamaları
görüntülü sohbet kadınlarla
parasız sohbet
Siirt Canlı Sohbet
maraş canlı görüntülü sohbet odaları
canlı sohbet odaları
Amasya Kadınlarla Rastgele Sohbet
Sakarya Mobil Sohbet
urfa rastgele görüntülü sohbet uygulamaları
1D980
ReplyDeleterastgele görüntülü sohbet ücretsiz
bedava görüntülü sohbet sitesi
diyarbakır sesli mobil sohbet
Diyarbakır Telefonda Sohbet
Hakkari Rastgele Görüntülü Sohbet
Sakarya Muhabbet Sohbet
eskişehir görüntülü sohbet siteleri
Samsun Görüntülü Sohbet Siteleri Ücretsiz
tokat görüntülü sohbet odaları
46B0A
ReplyDeleteburdur sesli sohbet sesli chat
gümüşhane canlı sohbet bedava
Bingöl Canlı Ücretsiz Sohbet
canli goruntulu sohbet siteleri
telefonda görüntülü sohbet
mobil sohbet sitesi
en iyi rastgele görüntülü sohbet
en iyi sesli sohbet uygulamaları
antep sohbet
69C71
ReplyDeleteBitranium Coin Hangi Borsada
Parasız Görüntülü Sohbet
Referans Kimliği Nedir
Instagram Beğeni Satın Al
Sohbet
Lovely Coin Hangi Borsada
Facebook Beğeni Satın Al
Binance Referans Kodu
Sui Coin Hangi Borsada
4E7E2
ReplyDeleteBitcoin Çıkarma Siteleri
Mexc Borsası Güvenilir mi
Onlyfans Takipçi Hilesi
Threads Beğeni Hilesi
Youtube İzlenme Hilesi
Bitcoin Nasıl Alınır
Görüntülü Sohbet
Luffy Coin Hangi Borsada
Coin Nedir
49E7A
ReplyDeleteSonm Coin Hangi Borsada
Bulut Madenciliği Nedir
Loop Network Coin Hangi Borsada
Bitcoin Nasıl Kazanılır
Binance Hesap Açma
Wabi Coin Hangi Borsada
Big Wolf Coin Hangi Borsada
Binance Referans Kodu
Telegram Görüntüleme Satın Al
At Nandi IVF, we recognize that each family embarks on a distinctive path to parenthood. We are committed to providing tailored support and making your dream of welcoming a healthy baby a reality. Our esteemed Best ivf clinic in delhi has successfully guided numerous individuals in building their families. The hallmark of the best IVF in Delhi lies in our exceptional expertise.
ReplyDeleteOur mission is to ensure that every couple has the opportunity to build a joyful and thriving family. That's why we are committed to offering accessible and efficient IVF treatment. With our team of skilled professionals and state-of-the-art technology, we strive to enhance the chances of success for our patients.
6AB09
ReplyDeleteuniswap
metamask
uwu lend
arbitrum
arbitrum
onekey
ellipal
arculus
roninchain
55BA2
ReplyDeleteAlanya
Başakşehir
Taşkent
Yerköy
Yusufeli
Bafra
İzmit
Merzifon
Beytüşşebap